Now we usually focus on knots around here. But even if you have the best knots around and the perfect fly, if the fish don't see it they aren't going to bite. You've got to get that fly in front of the fish! A big part of that is reading the water and knowing were the fish are, or are likely to be. This awesome graphic we found is a great guide or reminder of how to get that fly in to the strike zone. Now get out there are fish!
The internet is full of tips and tricks and gadgets. Half of which make me wonder if they really work. Some I know for a fact do not work. So before I repost anything I like to make sure it's legit. One I've been wondering about for a while is this diagram I found of a water filter tower made from 3 bandanas, and layers of grass, sand and charcoal.
On my last camping trip I decided to put it to the test. I did some modifications for my design. I wanted to limit it to one bandana, and simply layer the materials in that bandana. I did a base layer of sand, then rocks, then dry grass. MAJOR FUNCTIONALITY NOTE!!! This type of filter is NOT meant to make water safe to drink. It does not remove any kind of pathogens, or water born illness. It is meant to remove sediment making it easier to prepare for boiling or some other form of treatment.
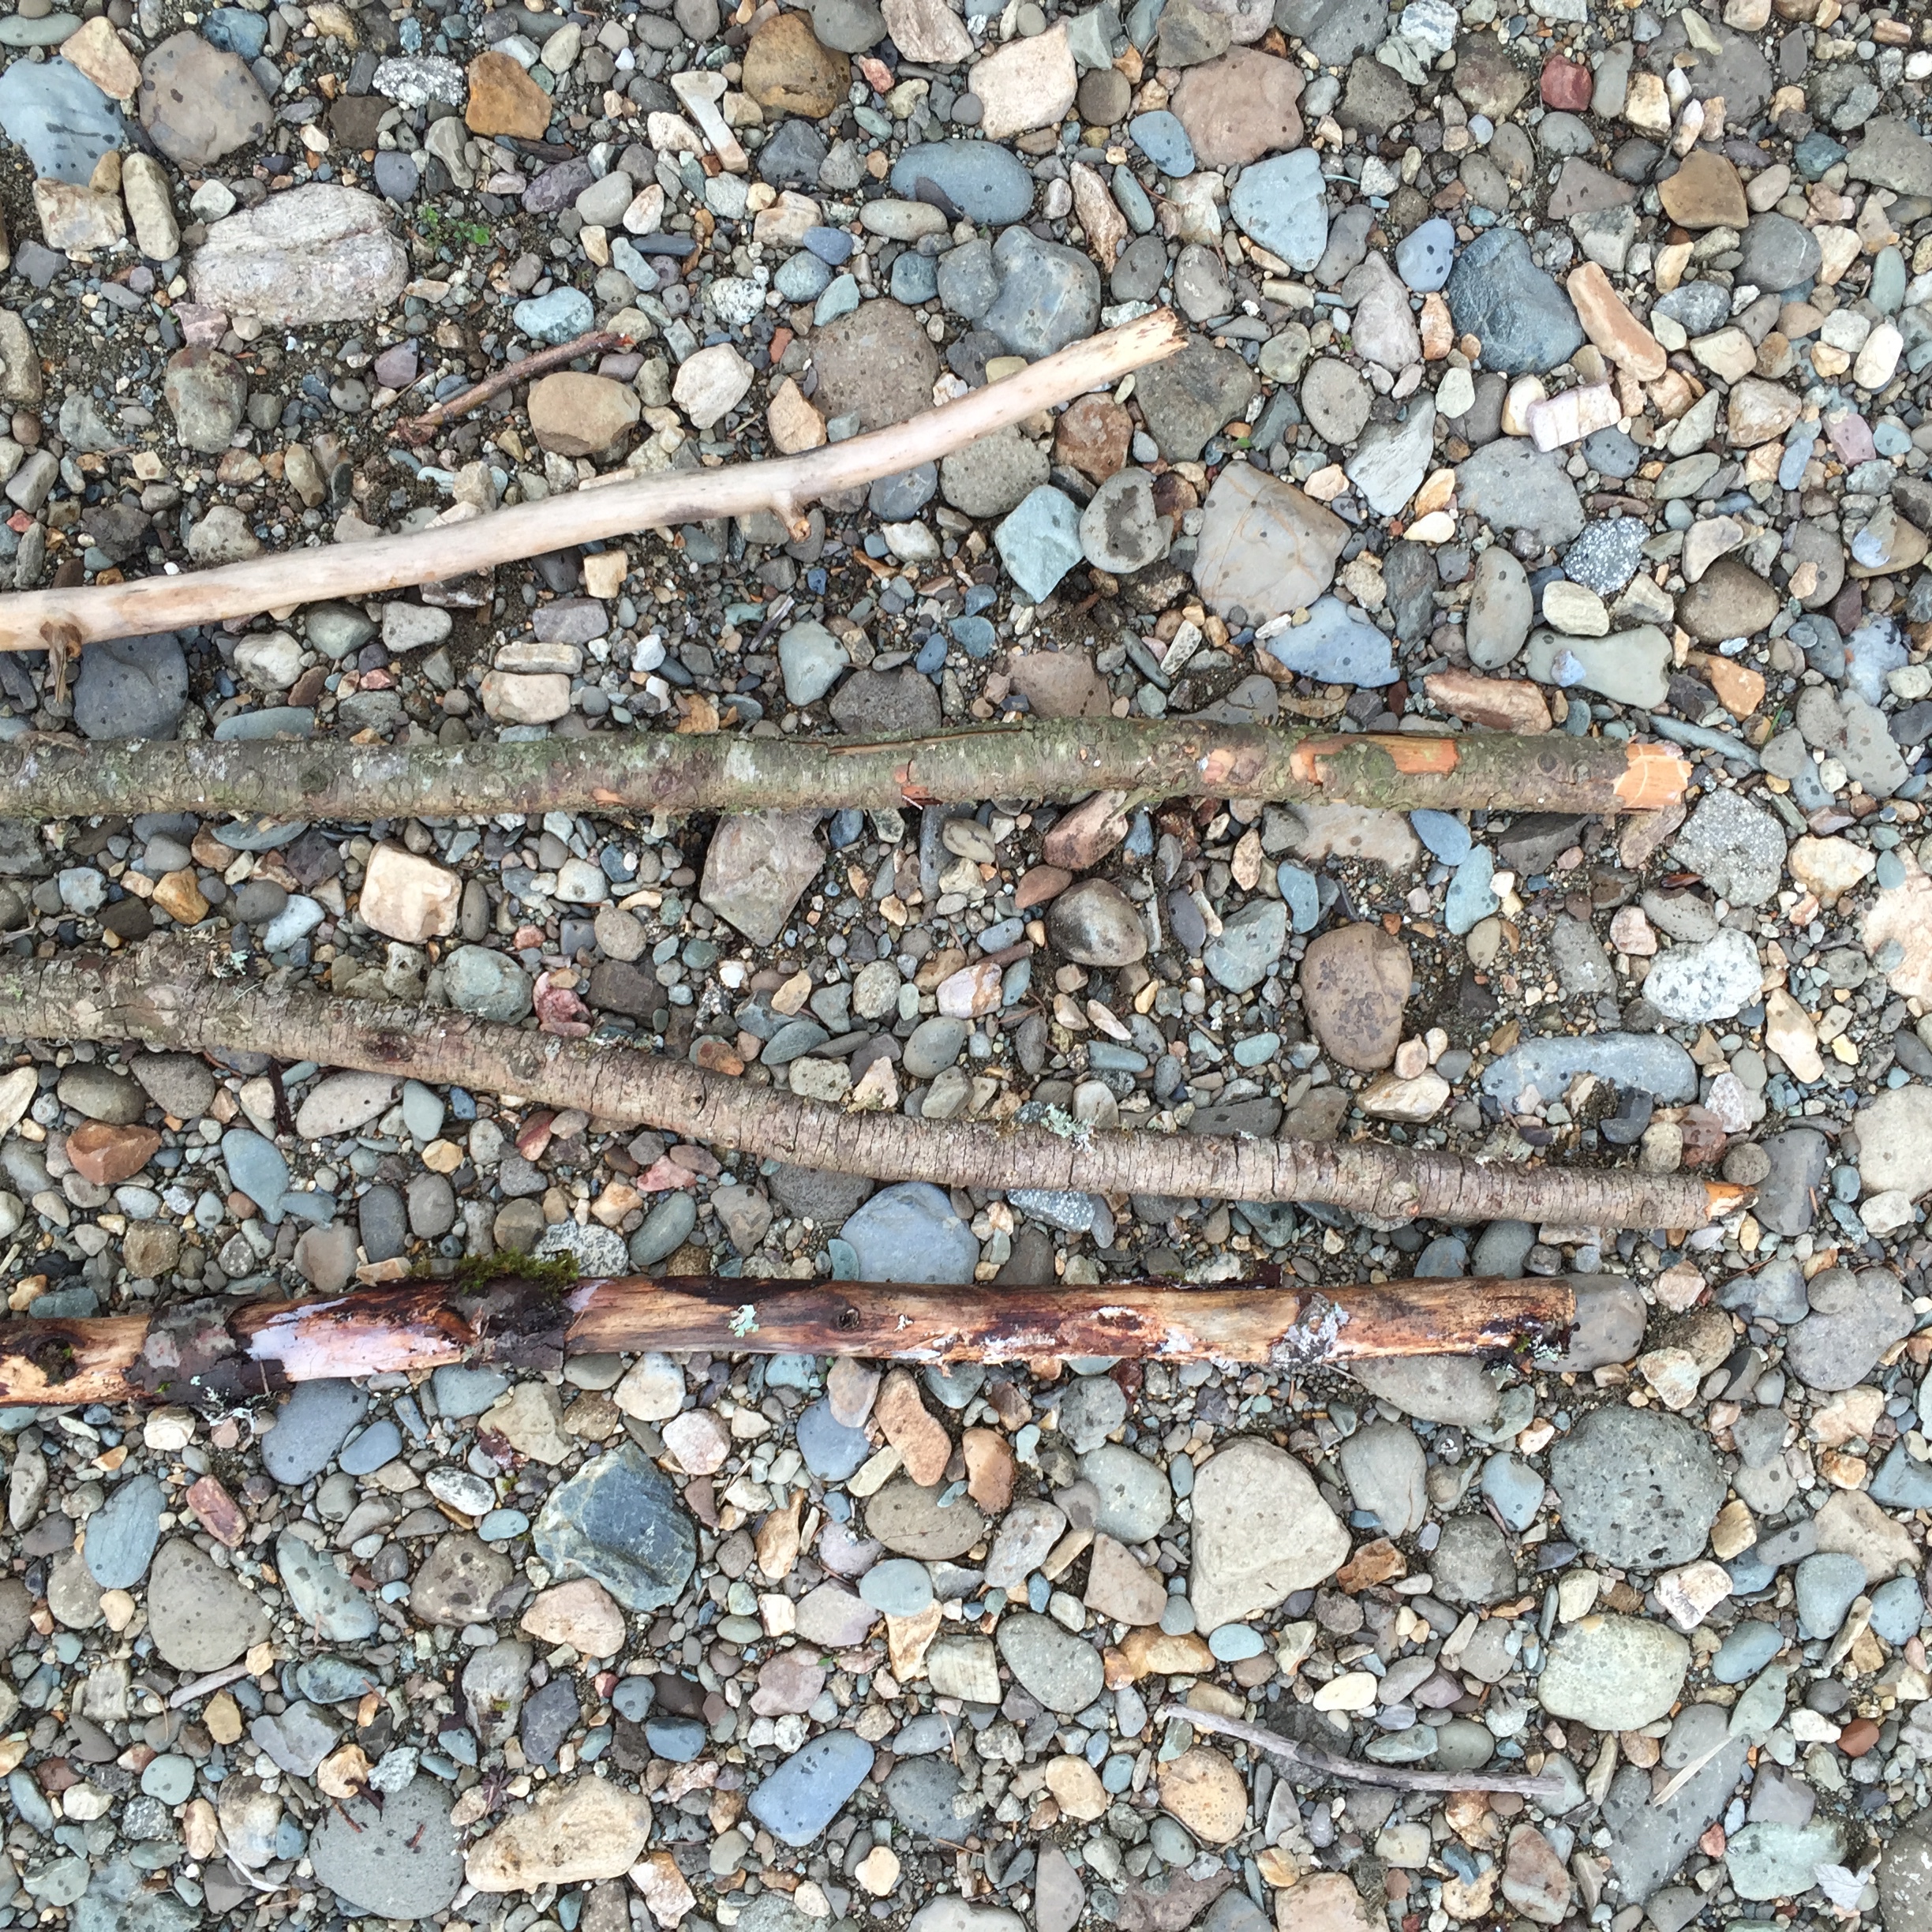
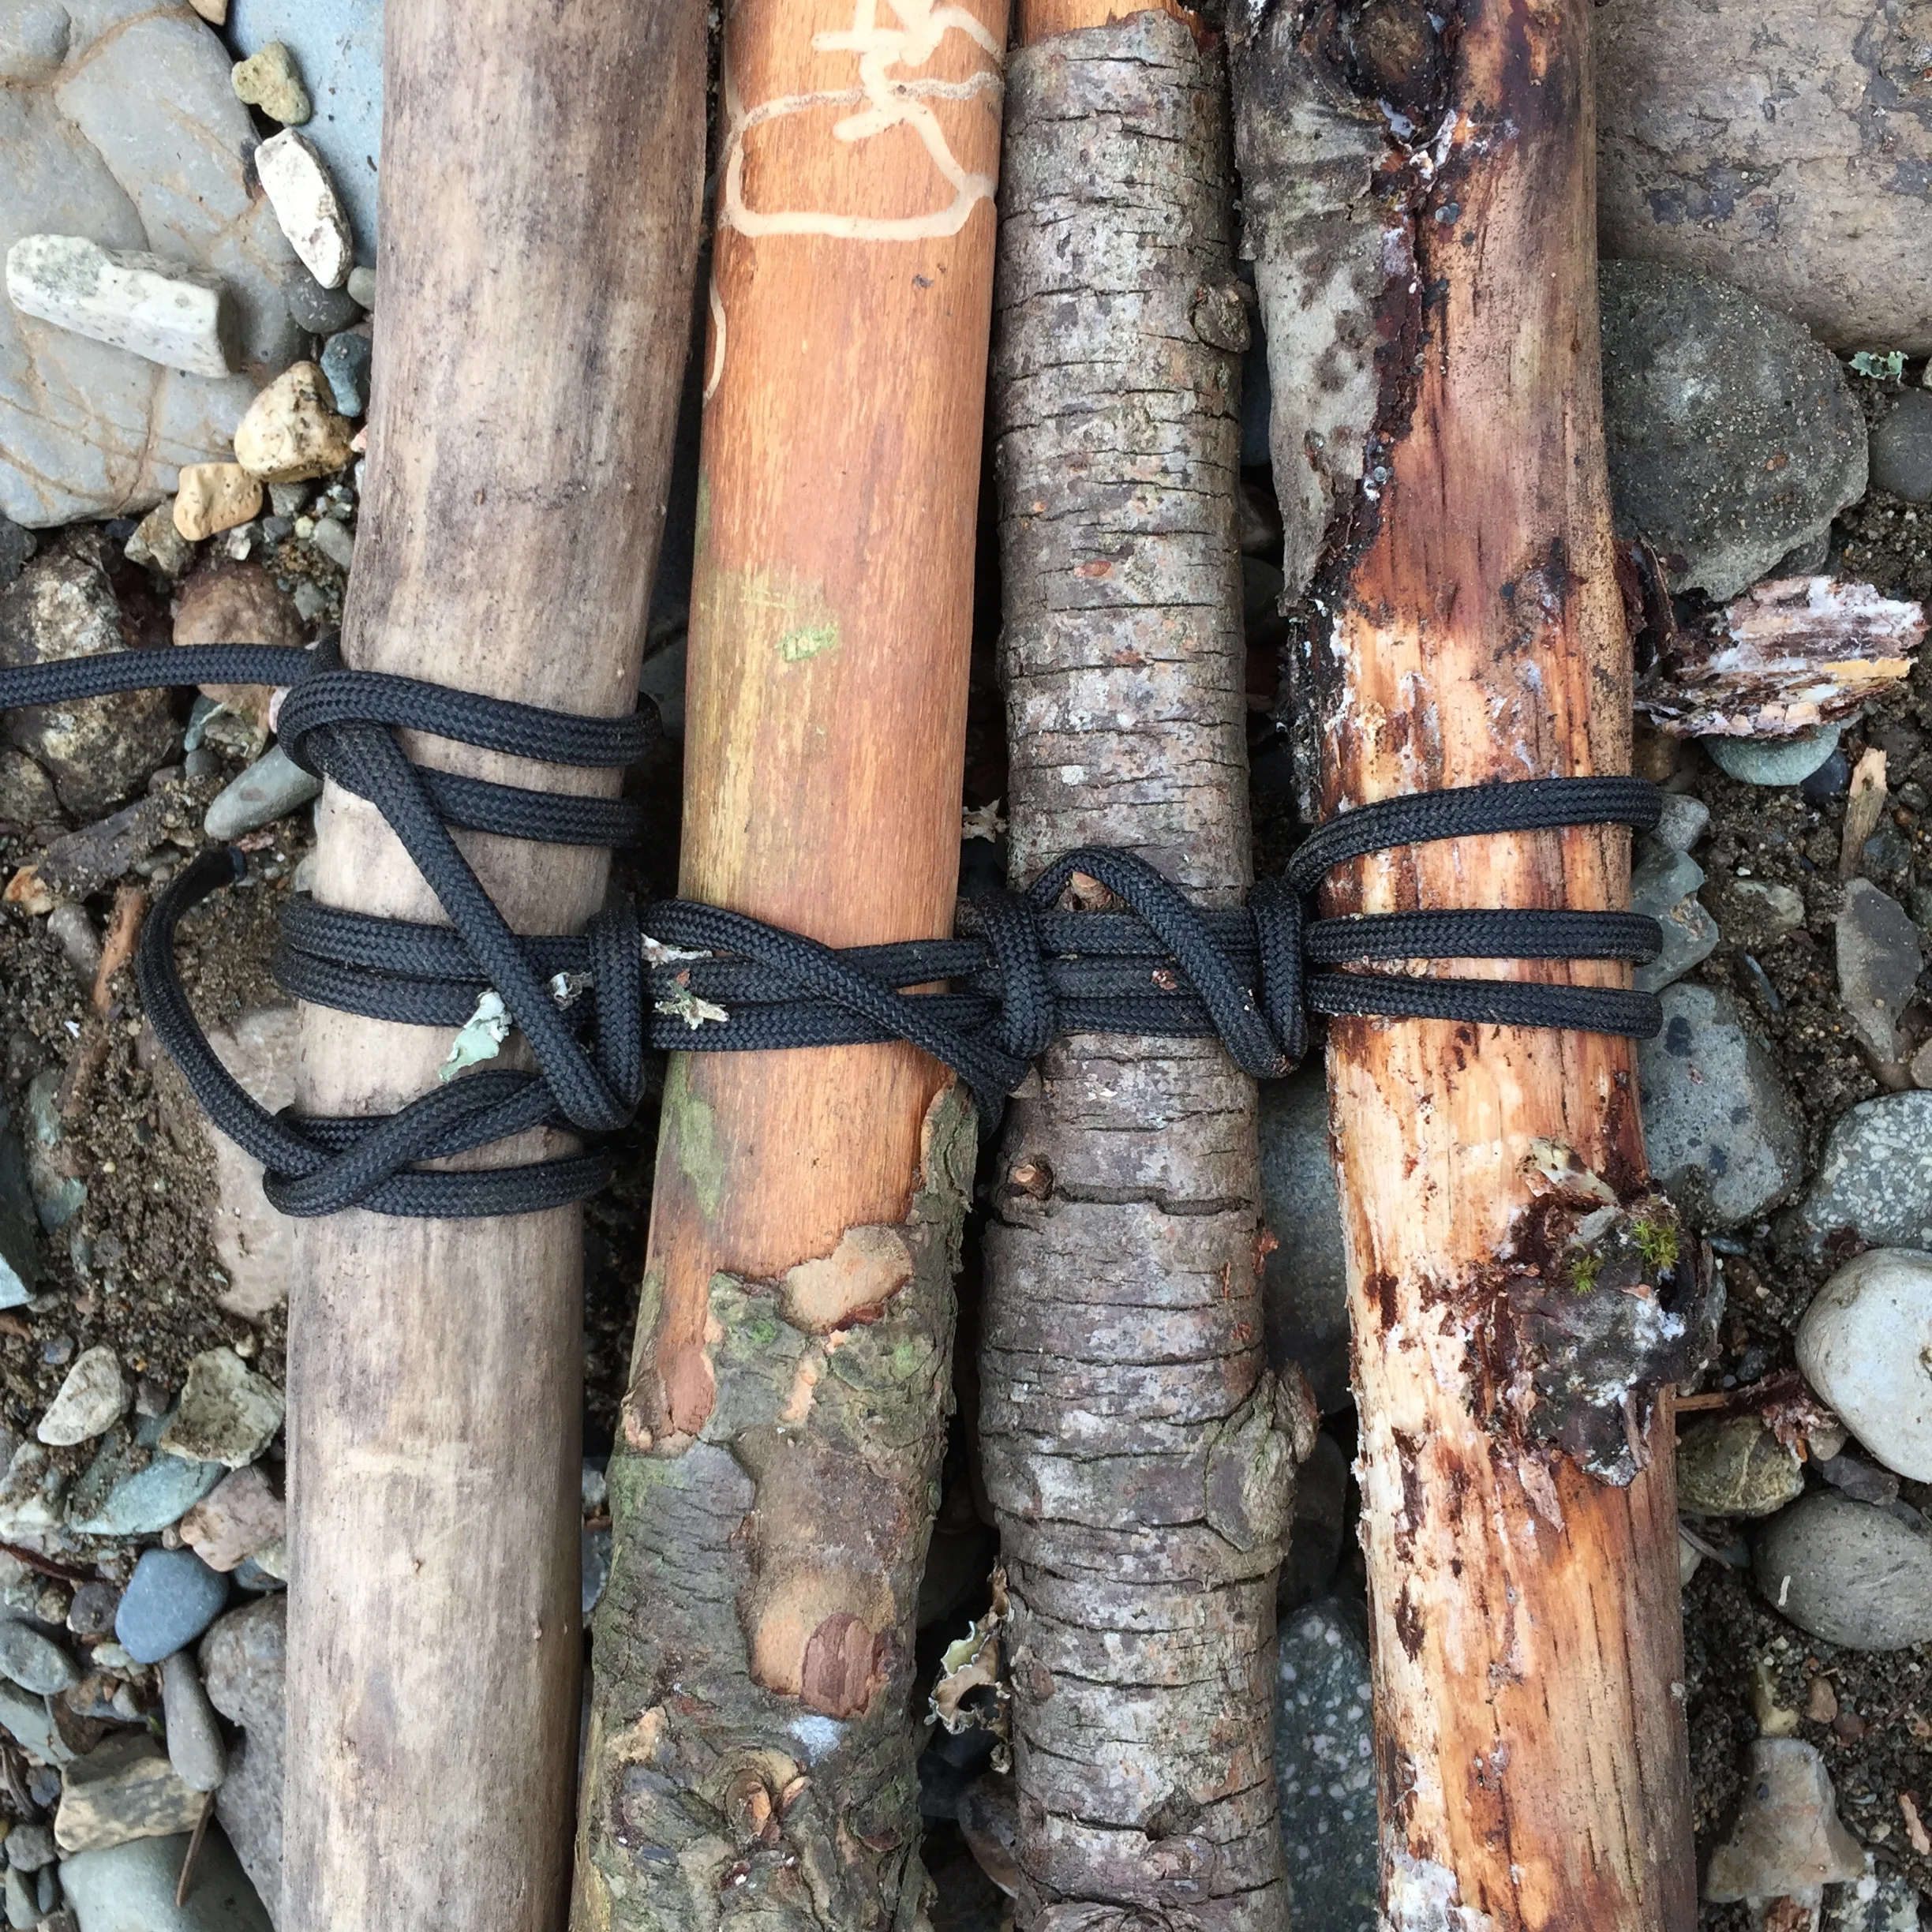
I started by making a 4 sided "quadpod". I make this the same way I would a tripod, but with an extra pole (for those really bad at math). Start with 4 equal length branches.
Tie a clove hitch around the first branch. Then weave the rope over and under the other branches. When you get the end, weave the rope back the other way. Do this 3-4 times. You can simply wrap the rope around the outside of all the branches, but the weaving method creates better friction and will hold better.
After that wrap the rope between each of the branches vertically to cinch down on the weave and tighten the whole thing up. This is called frapping. Then finish off with another clove hitch.
Then you can stand it up and space the branches apart. Tada! You've got a quadpod. This little structure has an endless list of uses. It can be used as the beginning of a shelter, or to hang a pot over a fire, as the starting point for a latrine or a dining table (don't get those two mixed up...). I could go on for ages.
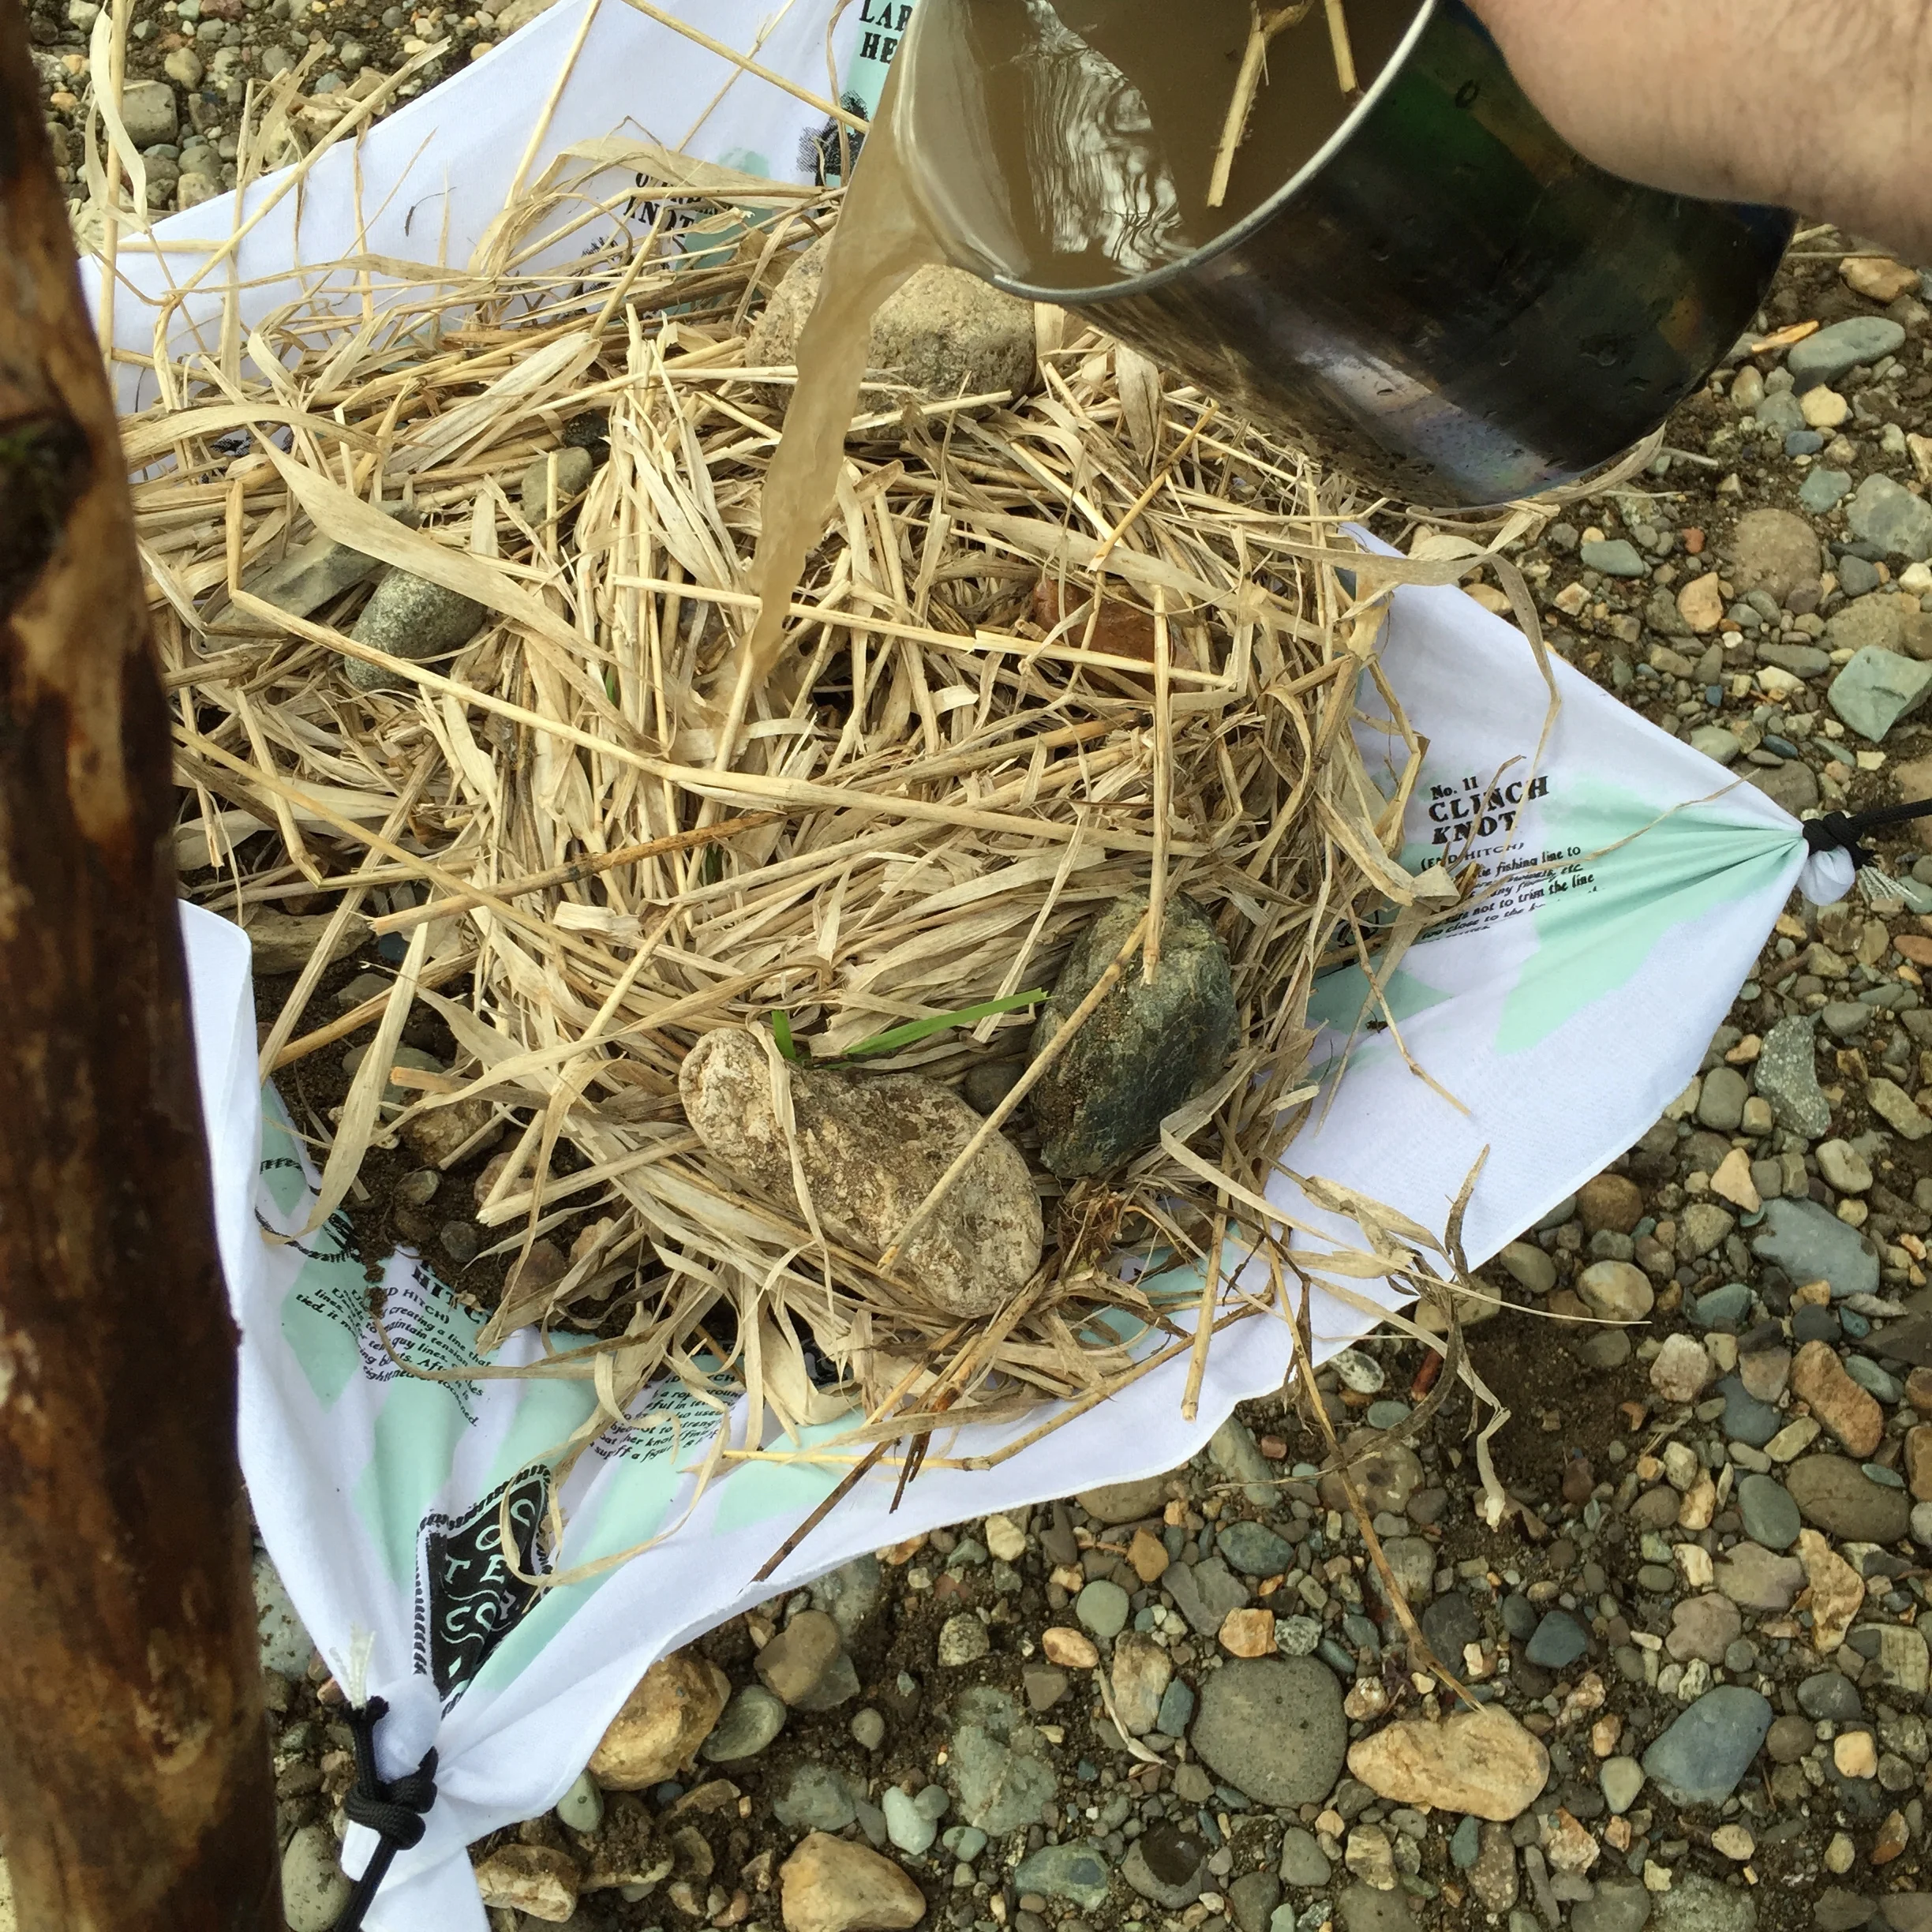
To connect the bandana to the quadpod, I tied two half hitches around a small pebble in each corner of the bandana and tie the other end of each rope to a branch.
I am using our Know Your Knots bandana for this one (it does feature the two knots used to create this contraption.) At this point I started filling the bandana with fine sand, then gravel and last a thick layer of dry grass.
Next I grabbed some excessively gross water and poured it over the top of the grass.
Here's a clip of the filter in action. You can see there's a major difference in the before and after!
The results were good. I found that I needed to run the water through a few times to get most of the sediment out, but it was certainly effective. If I were to do it again (and I probably will) I would make sure to wash the sand ahead of time. I think a lot of the first couple runs were just washing the soil from the sand out. A triple layered version of this would be more effective, but would also take more time to set up.
I would love to hear about your experiences with anything like this.
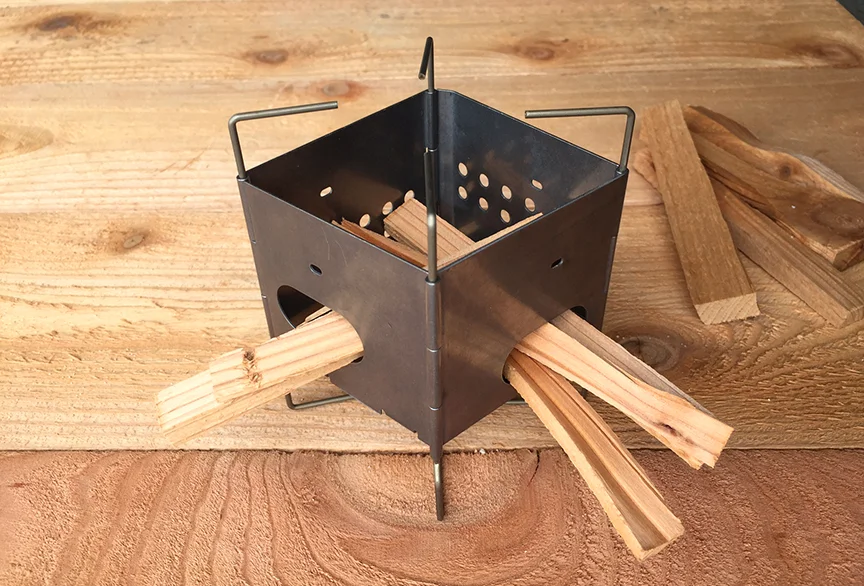
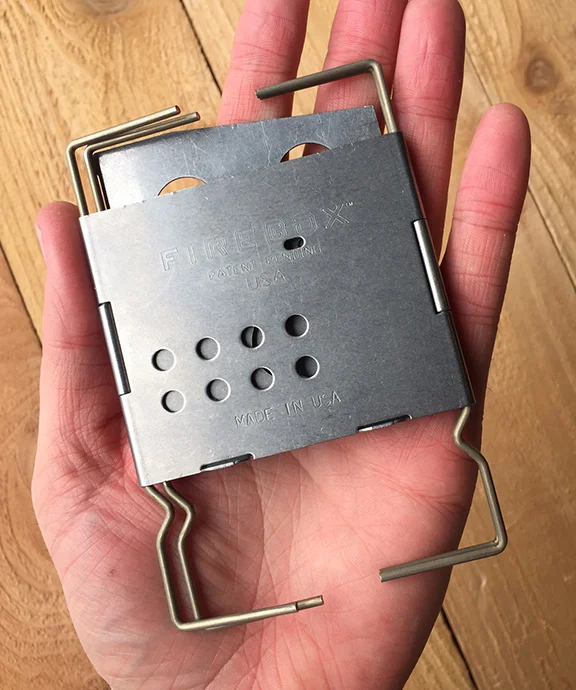
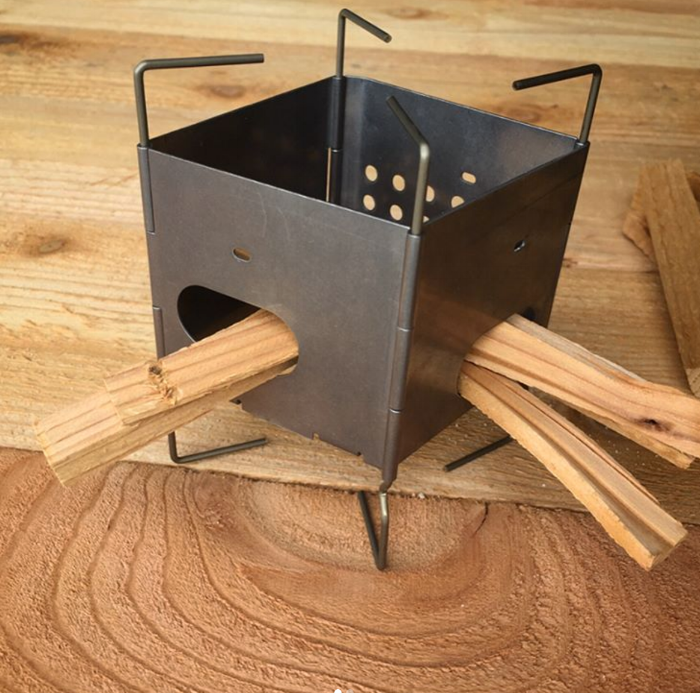
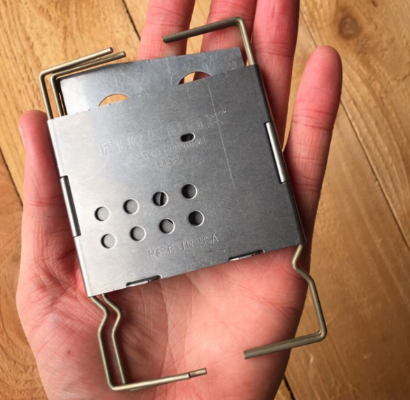
I've discovered an on the market option for wood burning backpacking stoves! The Firebox Nano 3" is amazing. It folds flat to be only 1/4" thick and weighs only 6 oz for the steel version or 4 oz for the titanium version. It can boil a cup of water in under 4 minutes and it runs on twigs! And in keeping with our brand ethos, it's made in the U.S.A. I like it so much that I've decided to over it in our shop. Click here to check it out.
Now back to the previous journal entry: --------------------------------------------------------------
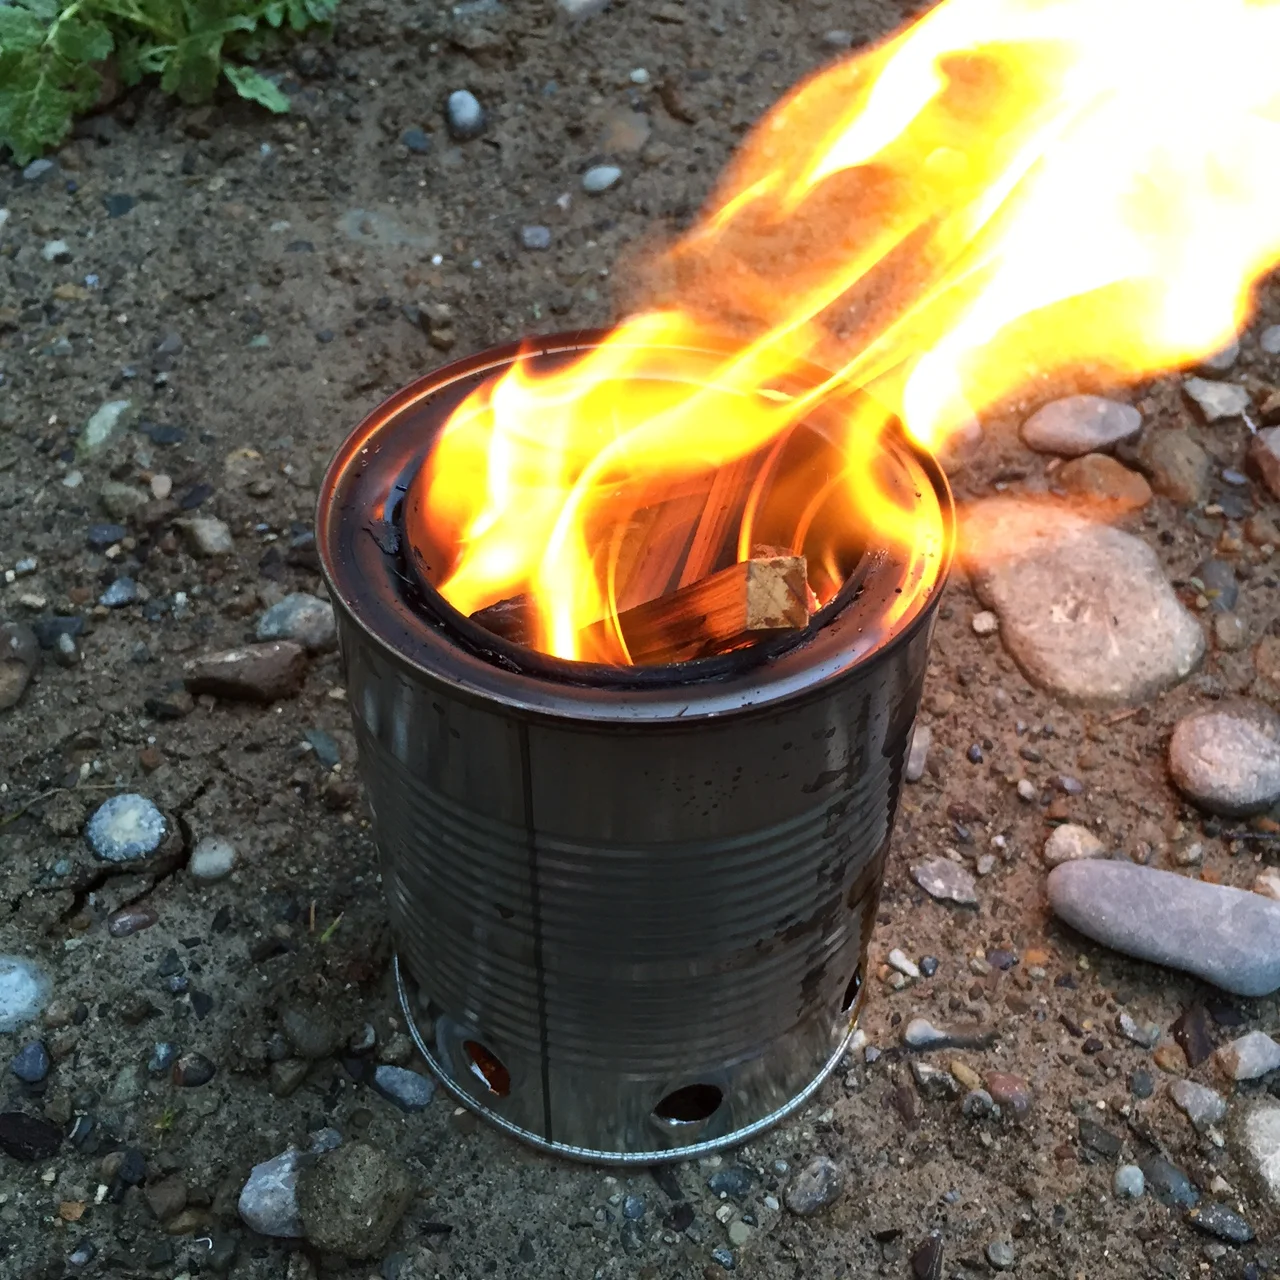
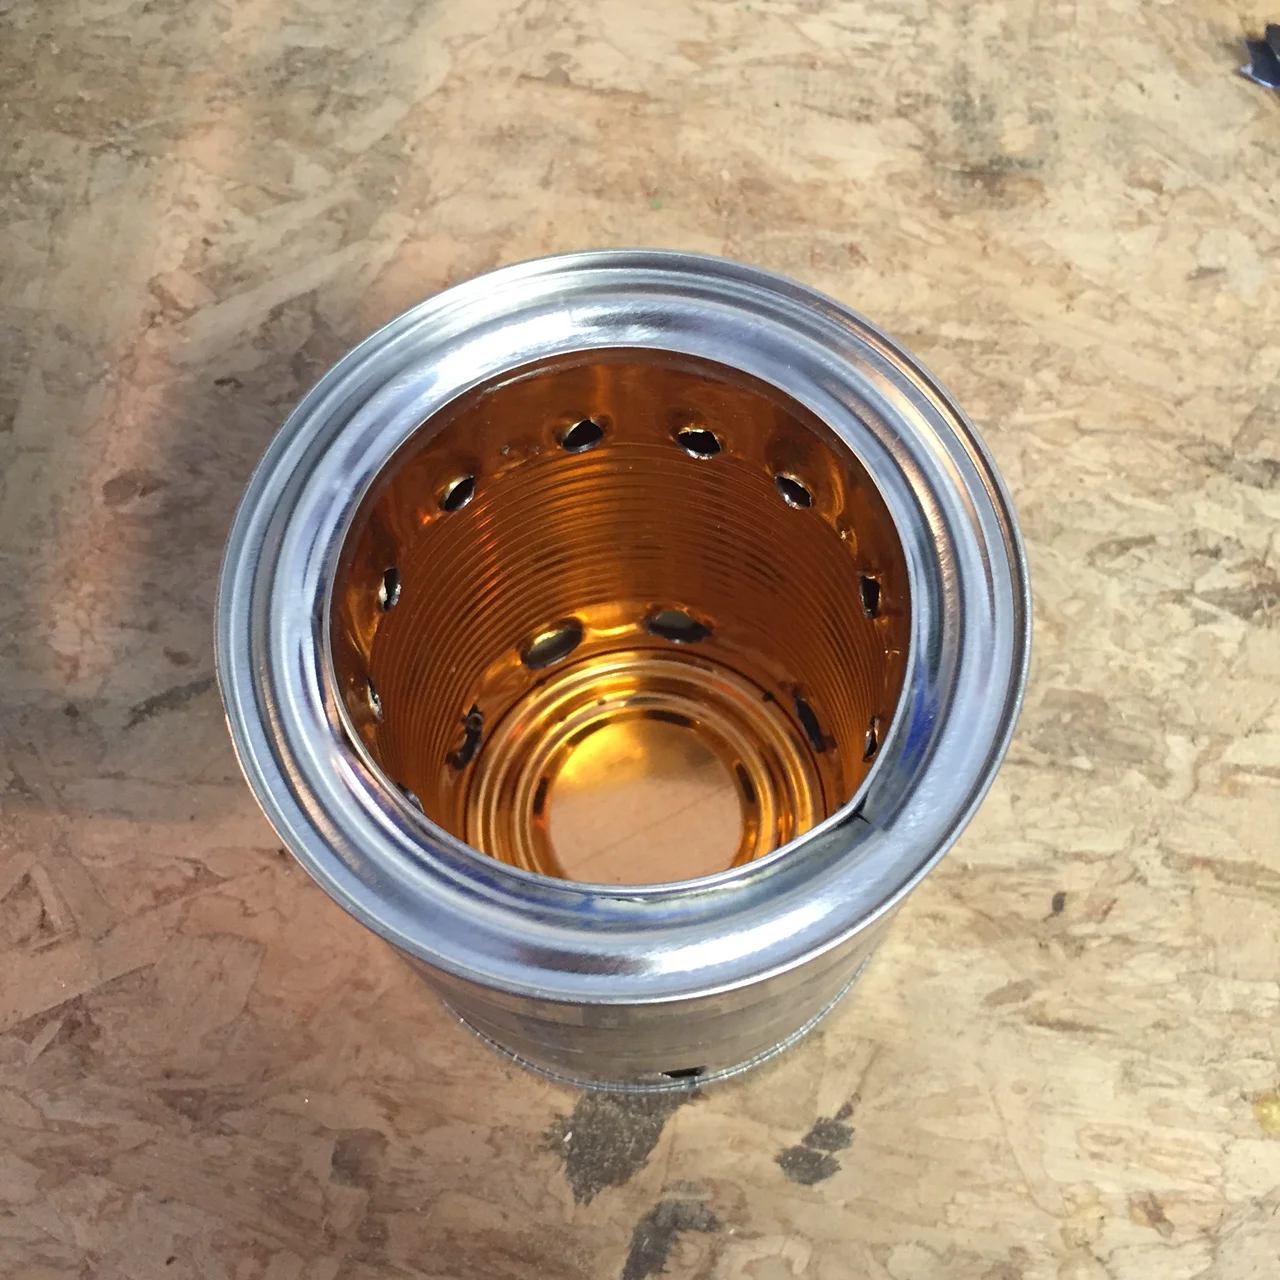
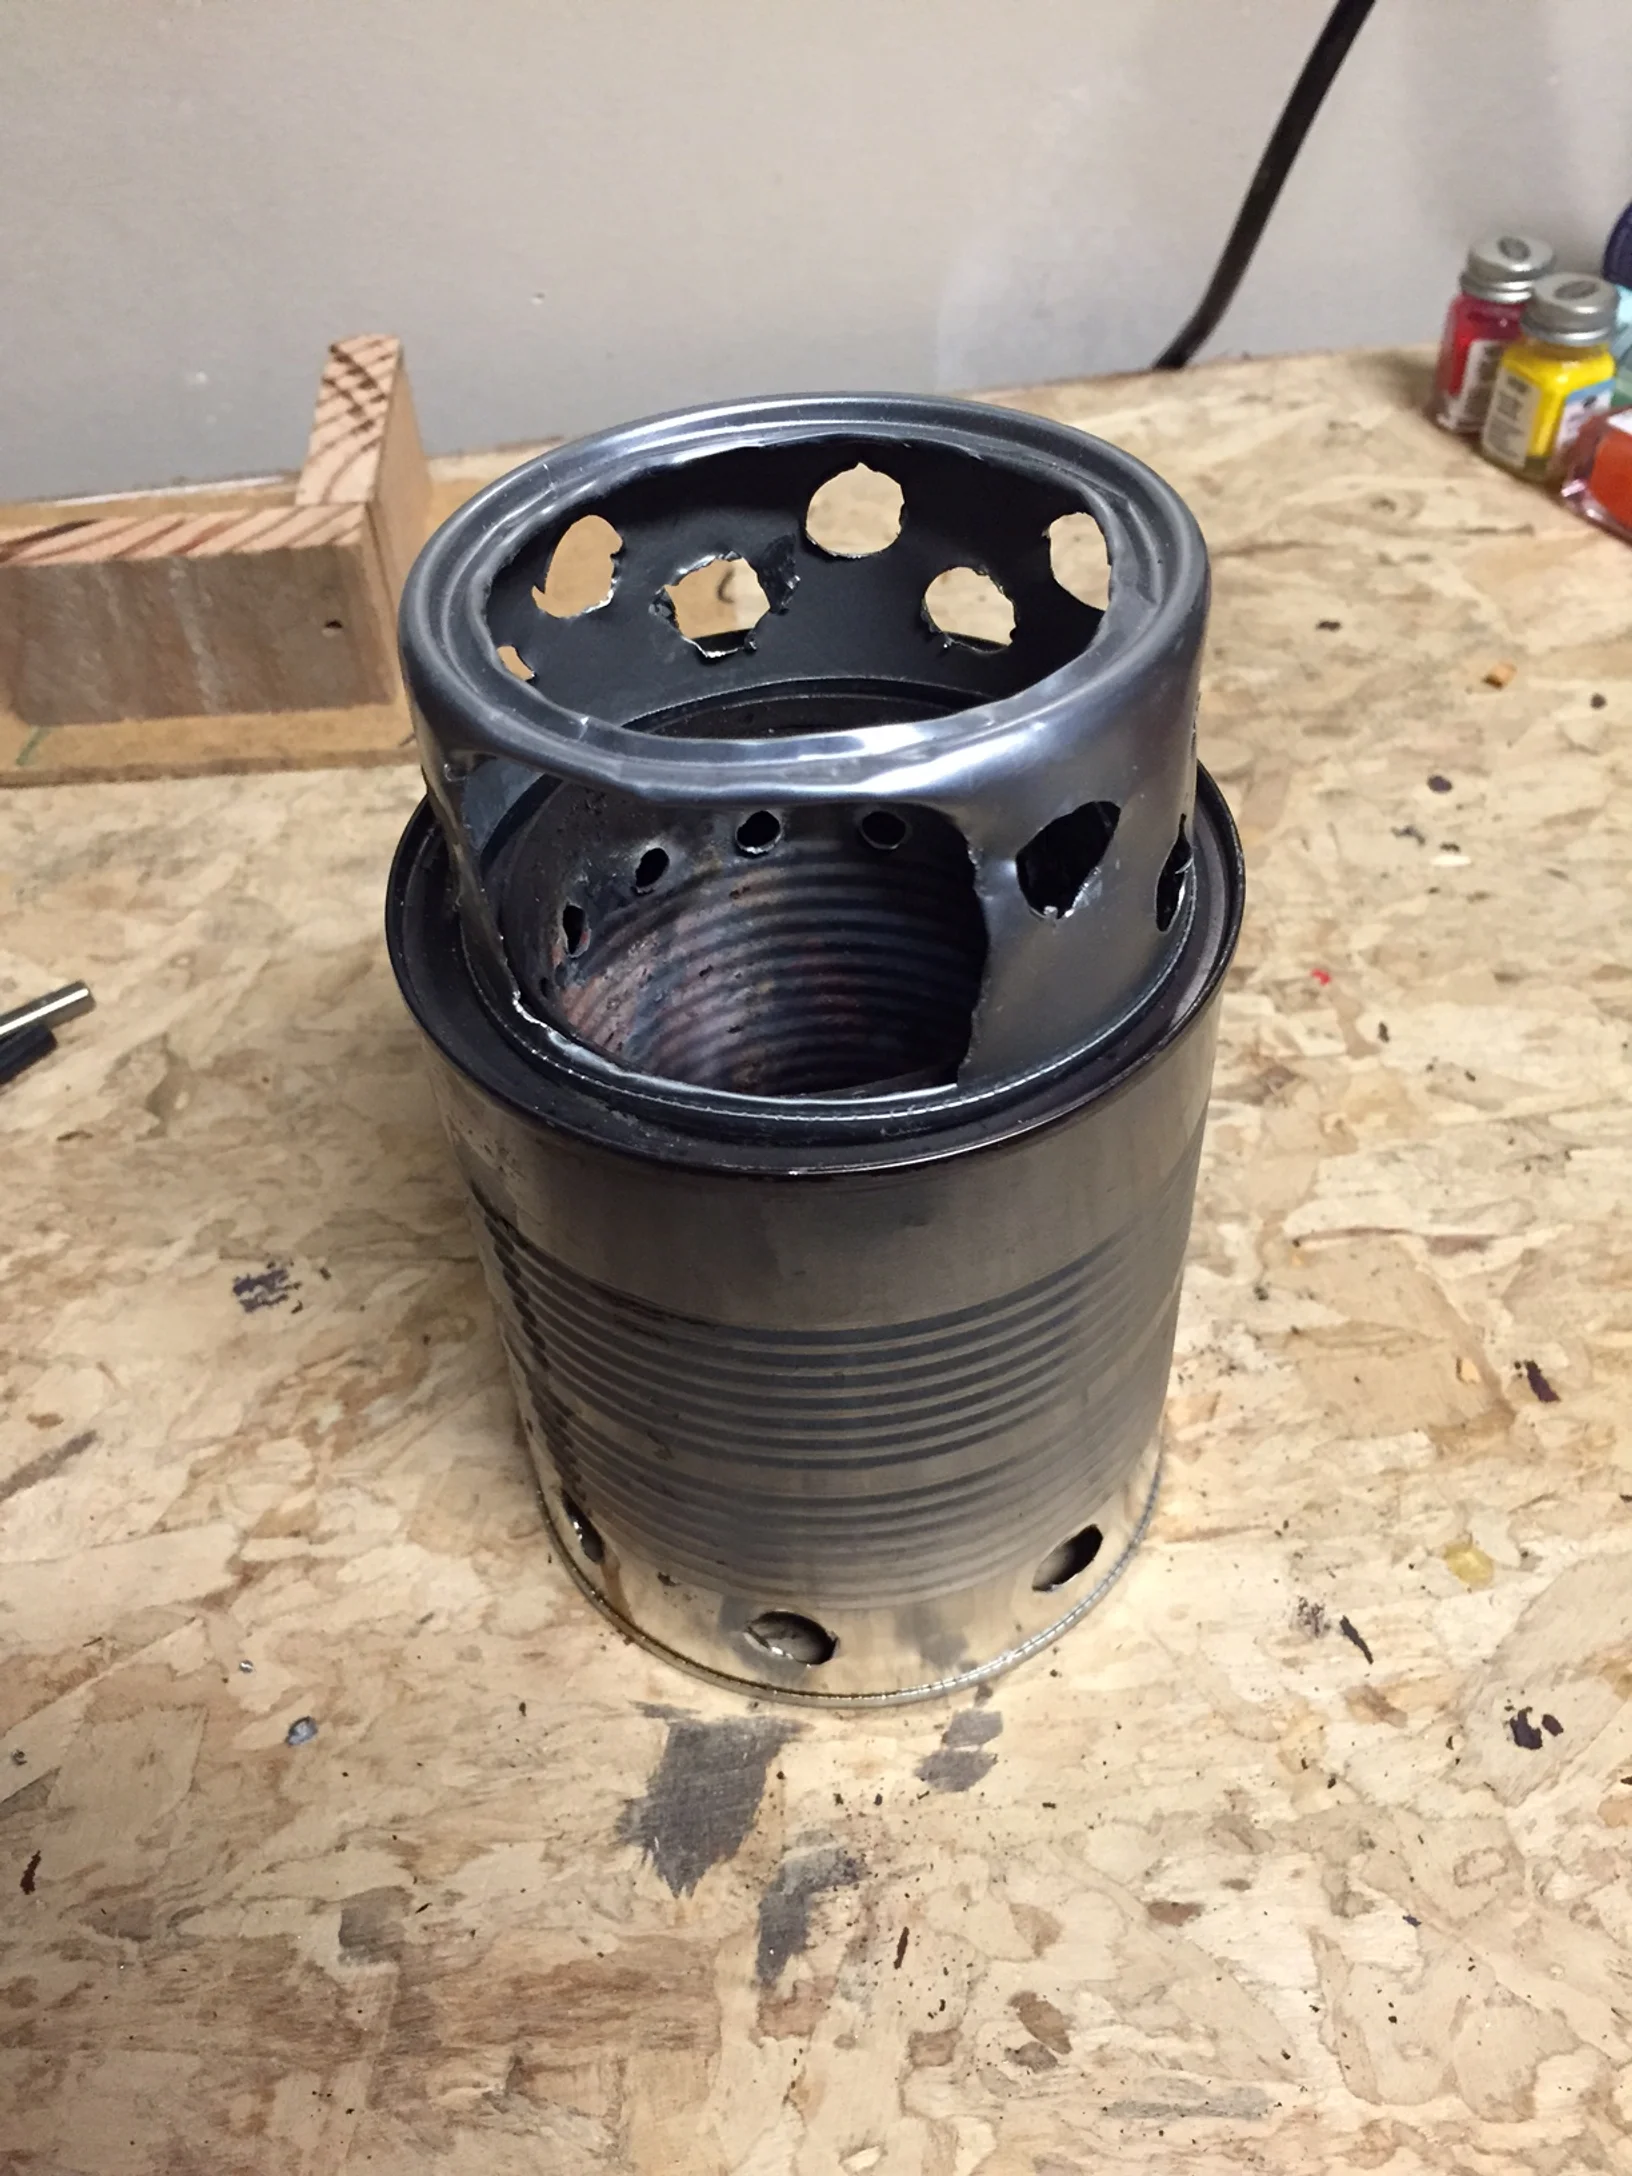
As promised, I am reporting on my wood gasifier backpacking stove build. I took a few designs and morphed them together. I have tried a couple other versions in the past that failed because I tried to scale them down too small. This time I used a standard 14.5 oz can for the inside can and a 28 oz can for the outside can. The first step is to cut a hole in the base of the larger can so the smaller can will fit inside of it snuggly. Trace the diameter of the small can on the bottom of the large can and drill small holes about 0.5" in from there all the way around the lid. Then use wire cutters to cut the space in between those holes until the center falls out. Then trim up to the line drawn about every quart of an inch to make flanges that will fold down. AFTER you get the small can drilled, it will slide through that hole and fit nice and snug. Make sure to drill it first! I'll get to that part now.
The key to getting this thing to work is airflow. I started by drilling 8 - 0.5" holes around the base of the outside can and the base of the inside can. Then drill 16 - 0.25" hole about 0.5" down from the top of the inside can. This design creates a vortex between the can and the hot gases/smoke jet back out of the smaller holes and into the flame. It ends up reburning the smoke and gases so it's very efficient and mostly smoke free. And it looks pretty cool as it burns.
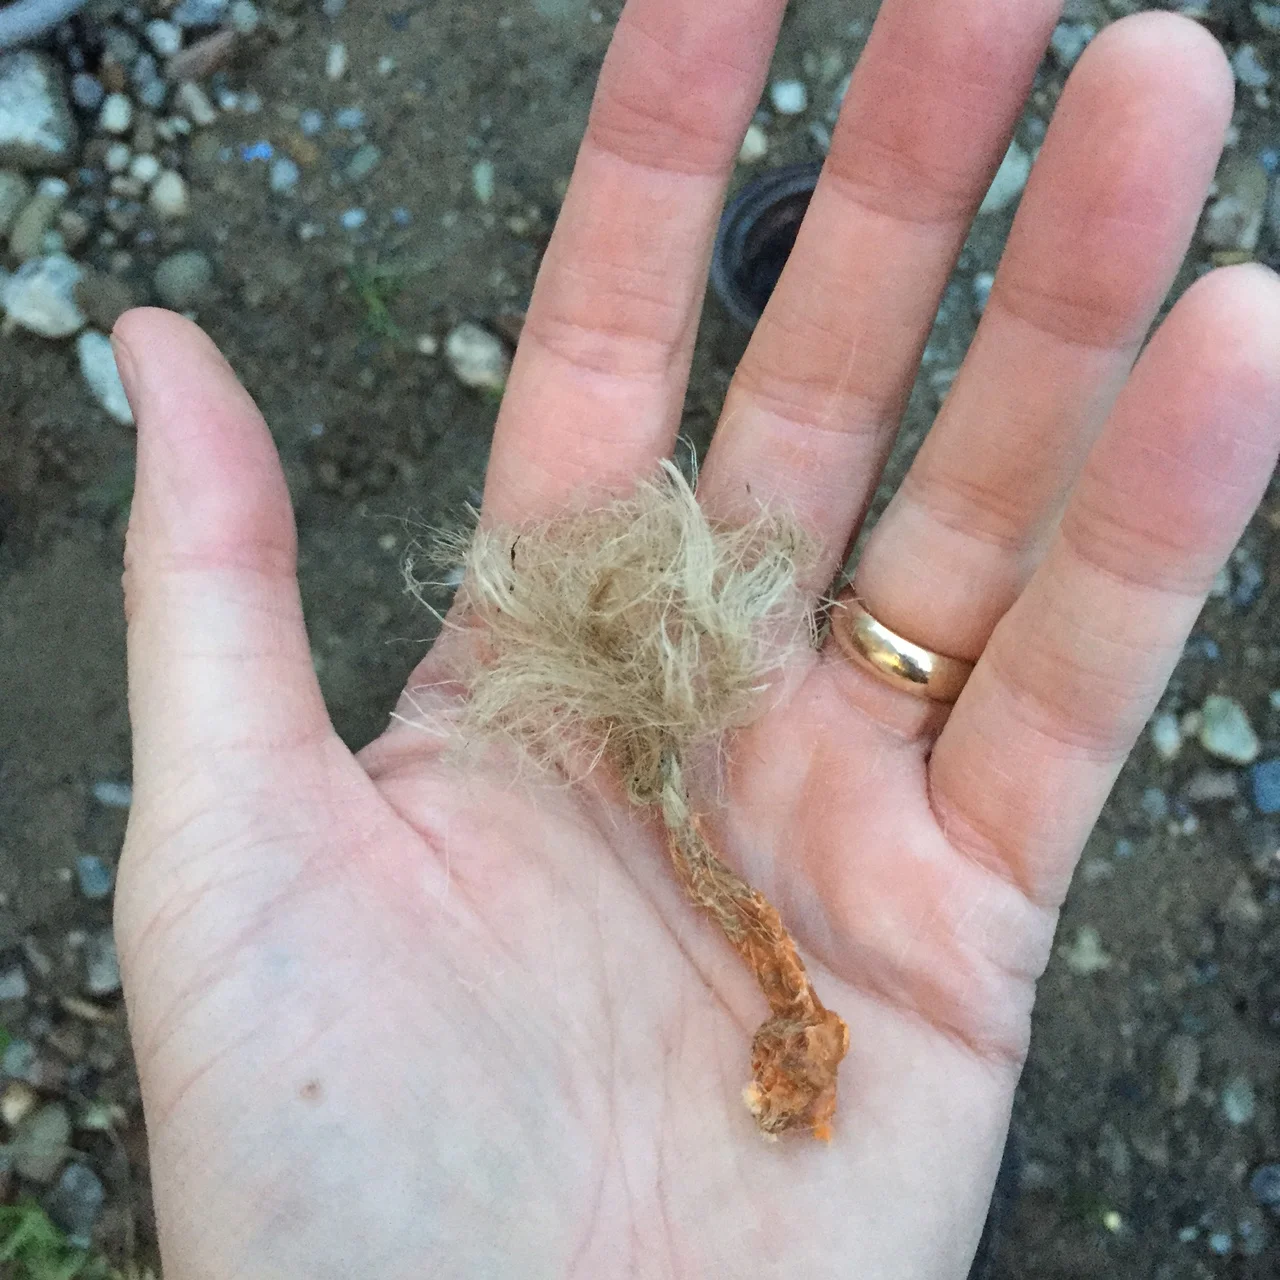
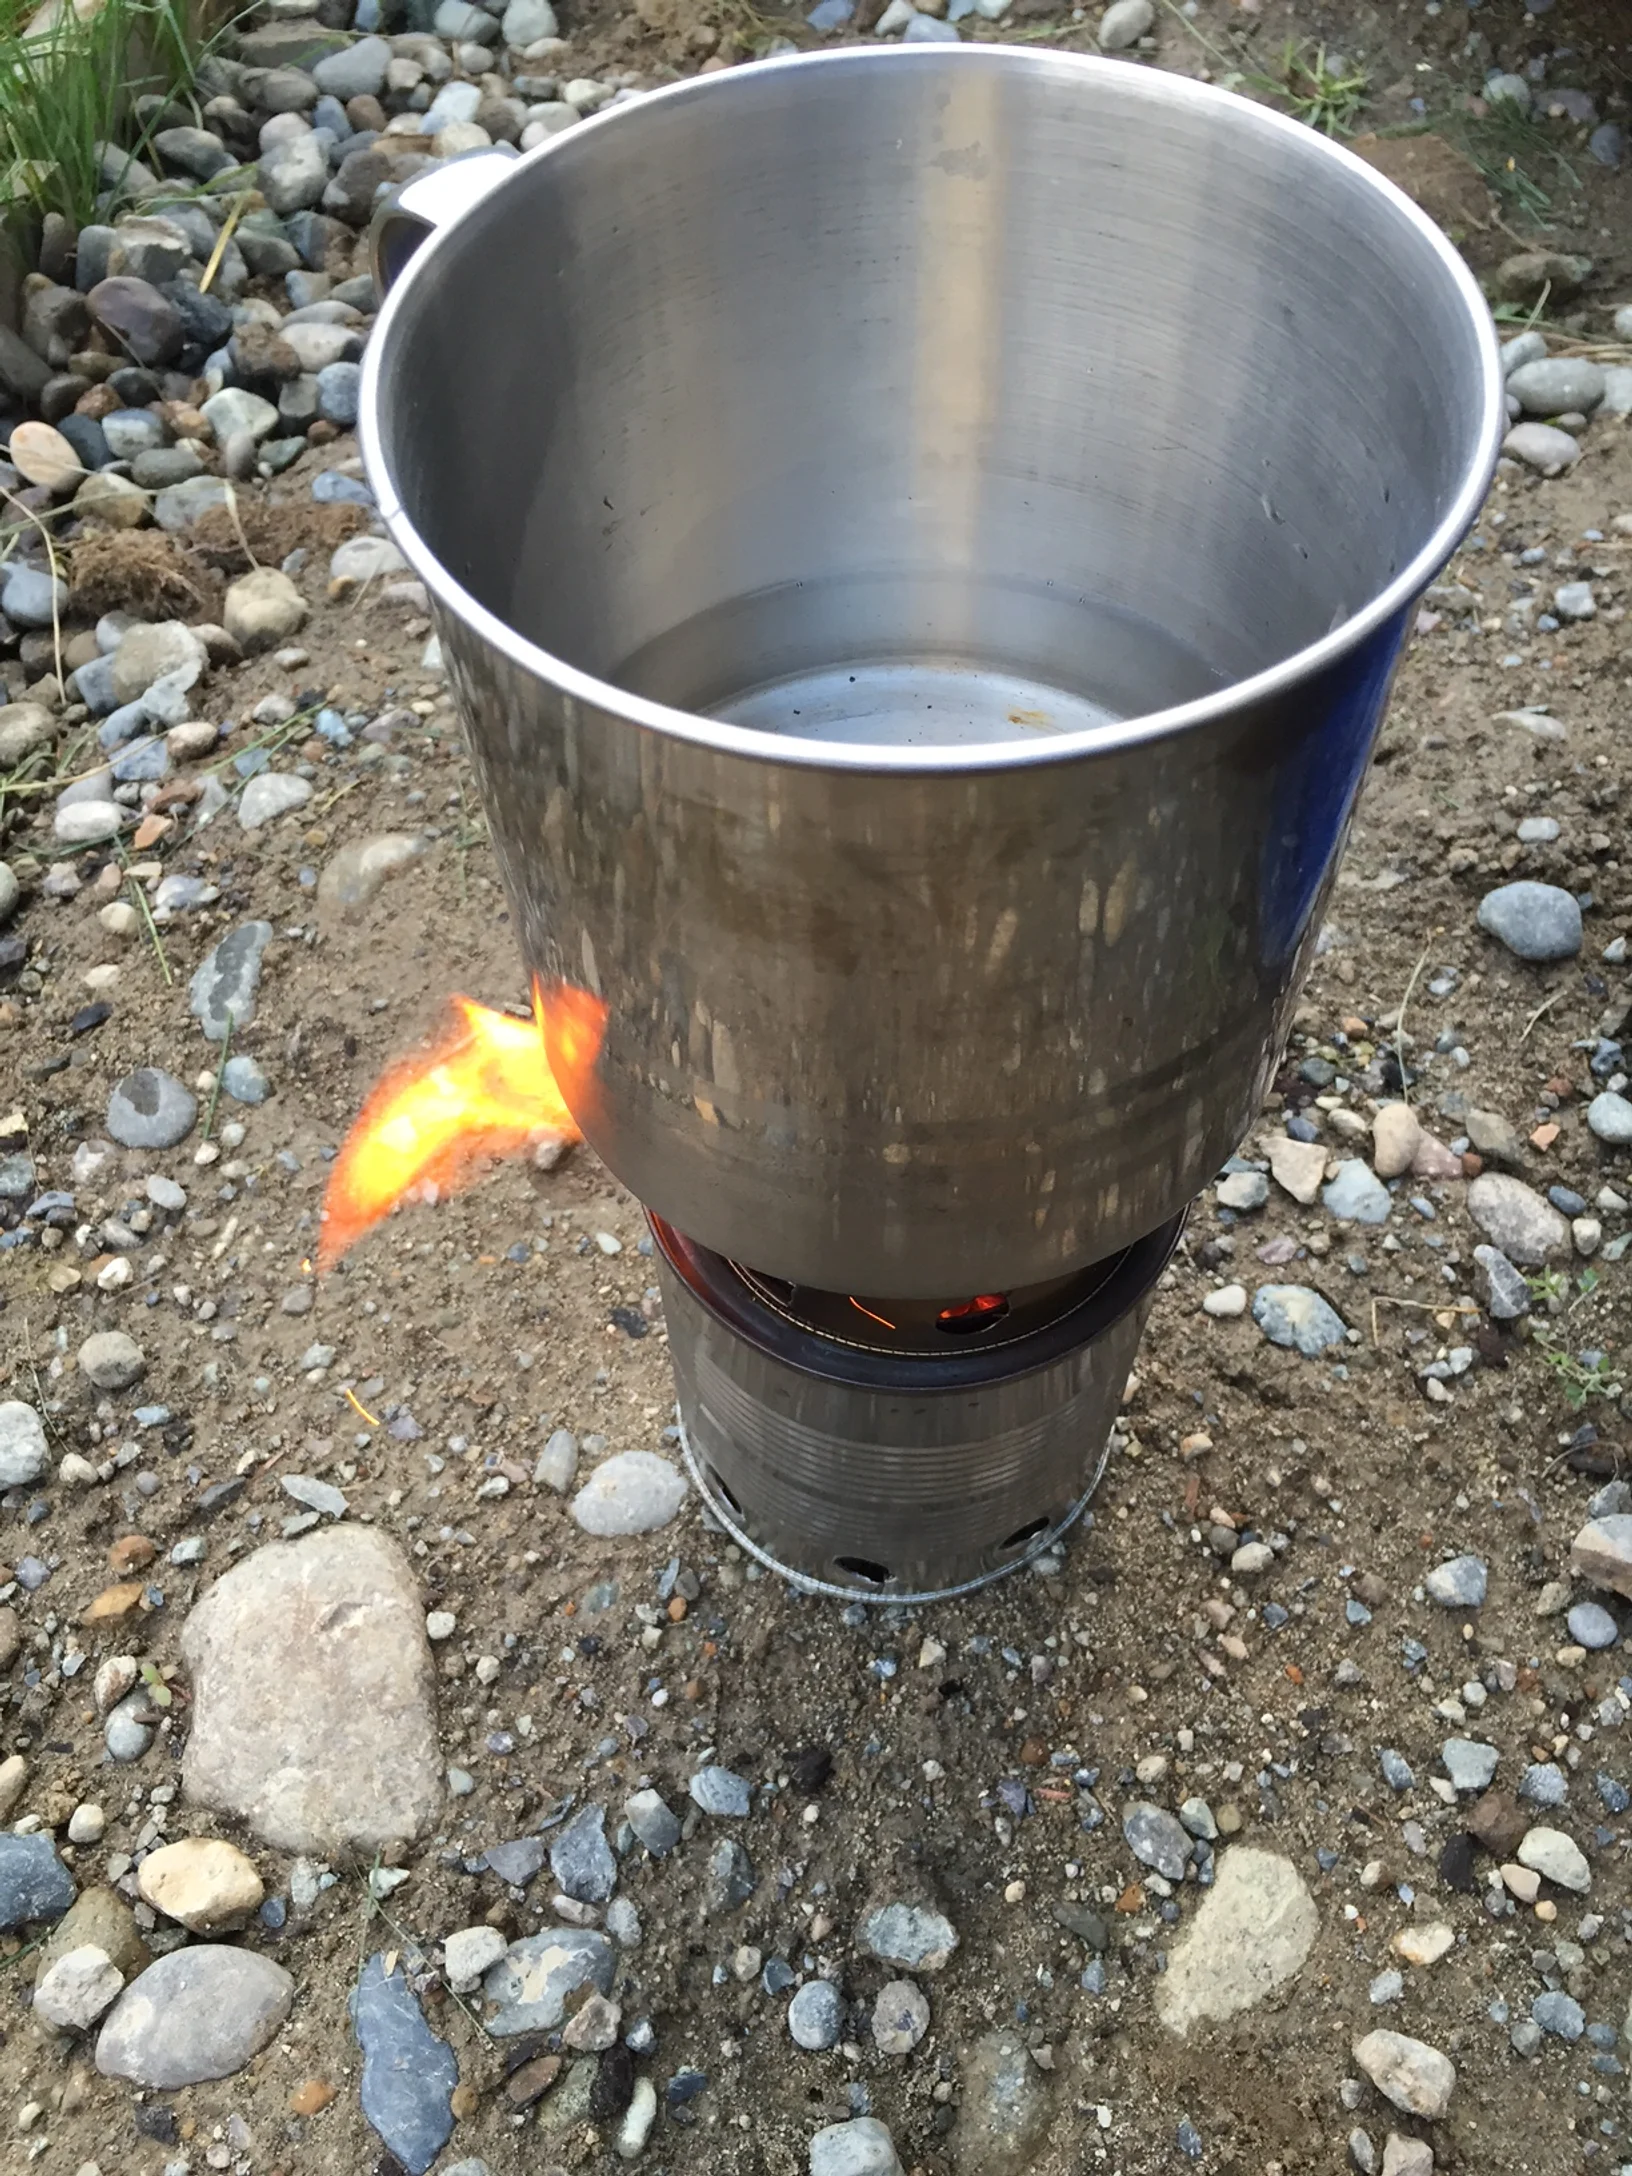
I did a couple test burns and found that it's best to load this thing backwards. Put the larger pieces in the bottom, then the smaller items, shavings and last the tinder. I used a bundle of twine fiber and a knot of twin soaked in wax. The fine fibers ignited quickly from the fire steel (This fire steel is part of a new product R&D. Don't tell anyone, it's a secret...) and the wax soaked knot burns long enough to catch the shavings under it. It ends up burning down until the larger items are all burning well. It makes for a lot less effort feeding the fire. I was using cedar and it burned pretty quickly. If you have access to it, I'd recommend hardwood chips.
I also built a little pot stand out of a tuna can. The pot stand fits inside the bottom of the stove for storage. In my test run I could get 2 cups of water to boil in about 12 minutes. It was pretty chilly and windy that day, so I think under better conditions (and with hardwood) I could get a boil going in less time. Still not bad for what it is.
Overall I am very happy with the design. I will be taking it on my next outing and really put it through it's paces. When not in use, the stove packs up nicely and fits inside the pot I use for backpacking. Very compact and light weight.
Let me know if you've had success with a similar design.
I've discovered an on the market option for wood burning backpacking stoves! The Firebox Nano 3" is amazing. It folds flat to be only 1/4" thick and weighs only 6 oz for the steel version or 4 oz for the titanium version. It can boil a cup of water in under 4 minutes and it runs on twigs! And in keeping with our brand ethos, it's made in the U.S.A. I like it so much that I've decided to over it in our shop. Click here to check it out.
----------- Now back to the previous post -----------
I love backpacking. The unparalleled views, the lack of people, the dip in crisp mountain lakes, the lack of people. Even the barely passable food is somehow amazing. One of the ways to make backpacking better is to lighten the gear up. One piece of gear that can help is your cooking system. There are a lot of fancy stove systems out there, but I don't know much about them 'cuz they're expensive. Also I like to make things. If that sounds like you, here are a few options you might like.
Denatured alcohol stoves.
These are simple to make (with a little skill) and don't require any special materials. They are super light weight and the fuel is easily accessible, which is why through hikers like them. They are a bit on the dangerous side. If they tip over, they get exciting. Next time we hang out I'll tell you about why I don't use mine very much any more. Good times.
Here's a simpler design and an instructional video.
Wood burning stoves.
I have been working on a design for one of these off and on for a while. I've been trying to create one that is as compact as possible. I started really small, and it didn't work. I don't think there was enough heat build up to sustain itself. I have seen some that work really well. You have to make sure you get good air flow! That's key.
Here's a good link to a tutorial on making these:
Another design that's pretty cool is the mini rocket stove. They are less compact, but you still might be able to make them work for backpacking. This design has fuel feed tube where you add wood to the fire. It also creates an airflow moving up the chimney that sucks more air in and sort of works like a jet engine. I've not made one of these, but they seem pretty neat-o. It's certainly on my to-do list.
Hopefully you've found something here to tickle your DIY fancy. I know I'll be making one of these bad boys soon. I'll post the results when I do.