instructional article

instructional article

DIY Fire starter smack down

I've seen a few different kinds of DIY fire starters ideas floating around. I wanted to try a couple out and see which performed better. I'm also doing this with my 8 year old son to each him about the elements that make a good fire starter. I chose to do a wax & cotton version and a wax & saw dust version. I'm evaluating these based on a few factors: 

1: Ease of creation (with kids)
2: Ease of lighting with a ferro rod.
3: How long do the burn.
4: Simplicity of ingredients

I'll include a step by step of how to make each below, but first... How do they stack up!?

colter co fire starter smackdown-01.jpg

After trying both of these I like them both for different reasons. The wax & cotton fire starters are super easy to make. They are compact, water resistant and easy to light with a ferro rod. Either of these fire starters would be super easy to light with matches or a lighters.

The advantage of the wax & saw dust fire starters is the burn time. They burn a very long time. Living in the Pacific Northwest one of the major concerns for getting a fire started is working with damp wood. Having a full 13 minutes of burn time to work with gives you a much stronger chance of burning some of the moisture out of damp wood and getting a good blaze going. 

Now for the How To:

WAX & COTTON FIRE STARTERS

Using a double boiler melt wax or paraffin in an empty tin can. I opted for the tin can option because I didn't feel like getting murdered by my wife for ruining another pan :) It makes clean up easy... just toss the can into the recycling bin. I used 6 votive candles to make 22 fire starts.

IMG_1082.JPG

Cover a cookie sheet with a layer of parchment paper. Once the wax is melted dip 100% cotton rounds into the wax briefly. Let the excess wax drip off back into the can before placing them on the parchment paper to cool. I recommend holding the can over the parchment paper to avoid creating a trail of dripped wax. 

colter co fire starter

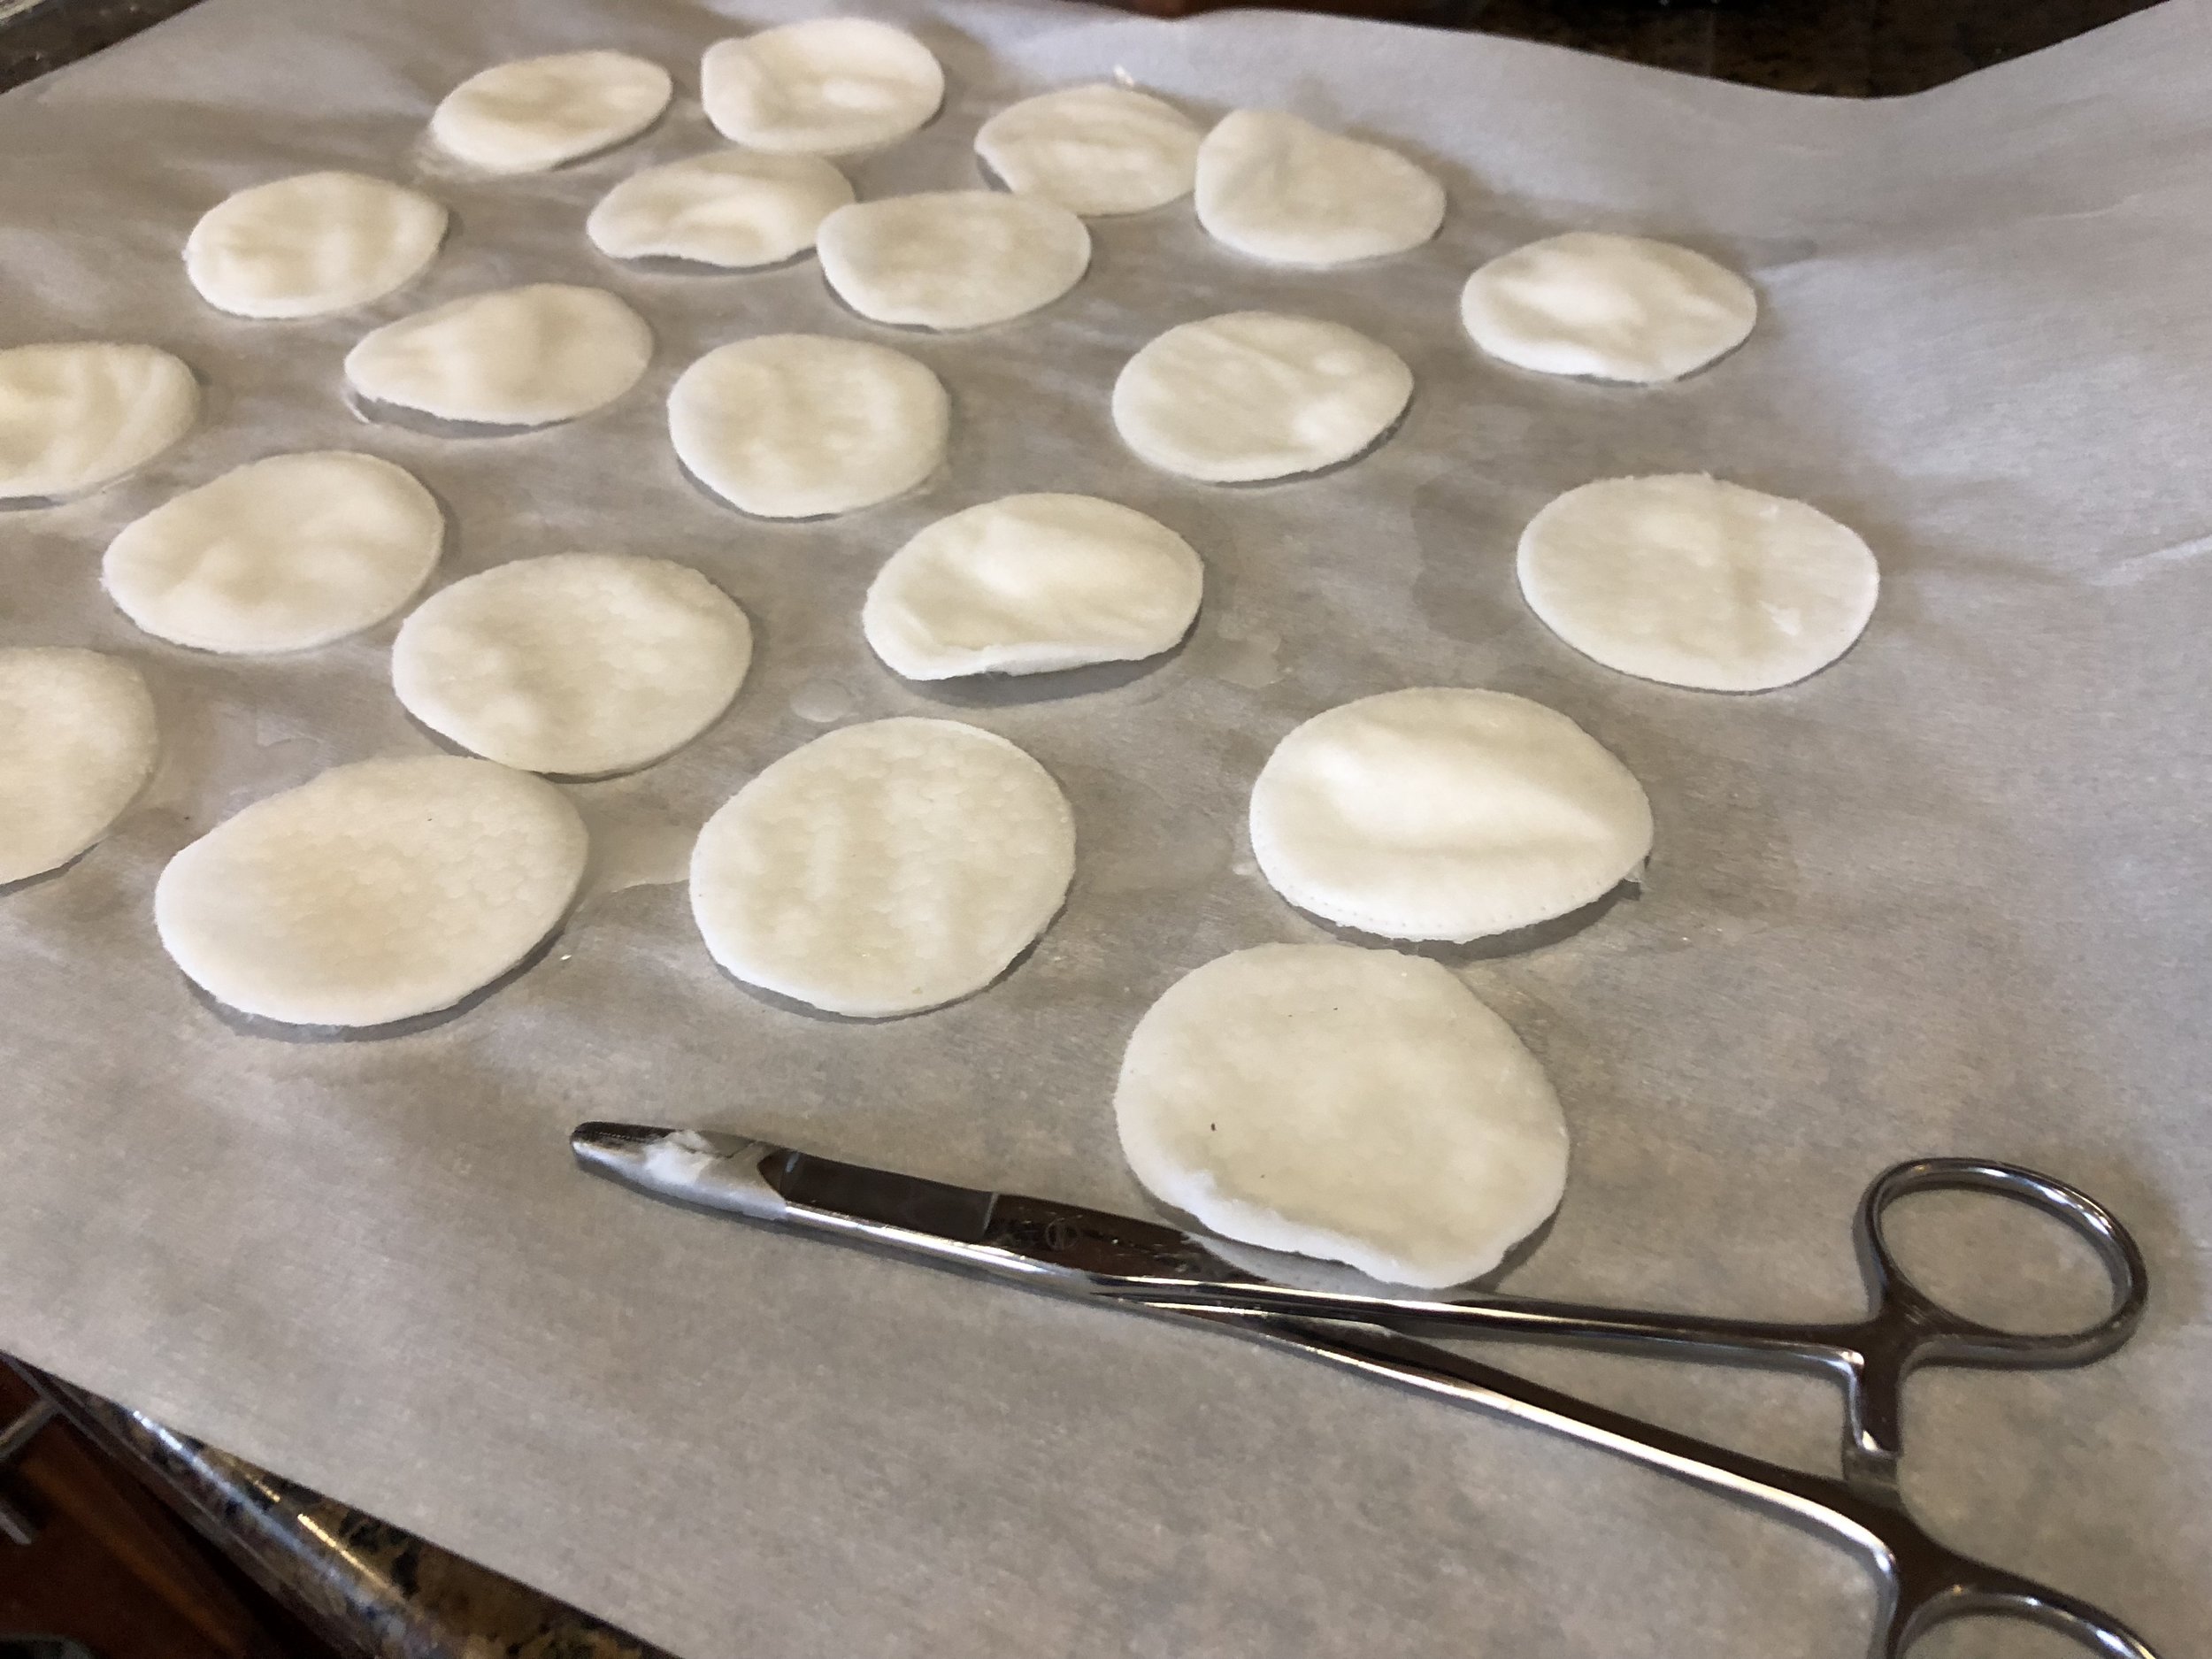
That's really about it! Once they cool they're ready to put into your fire starting kit for your next outing. When you use them, you can tear them in half to stretch them farther if you need to. Rough up the cotton fibers as fluffy as you can get them if you're using a ferro rod to start these.

colter co fire starter
Screen Shot 2018-01-20 at 3.24.09 PM.png


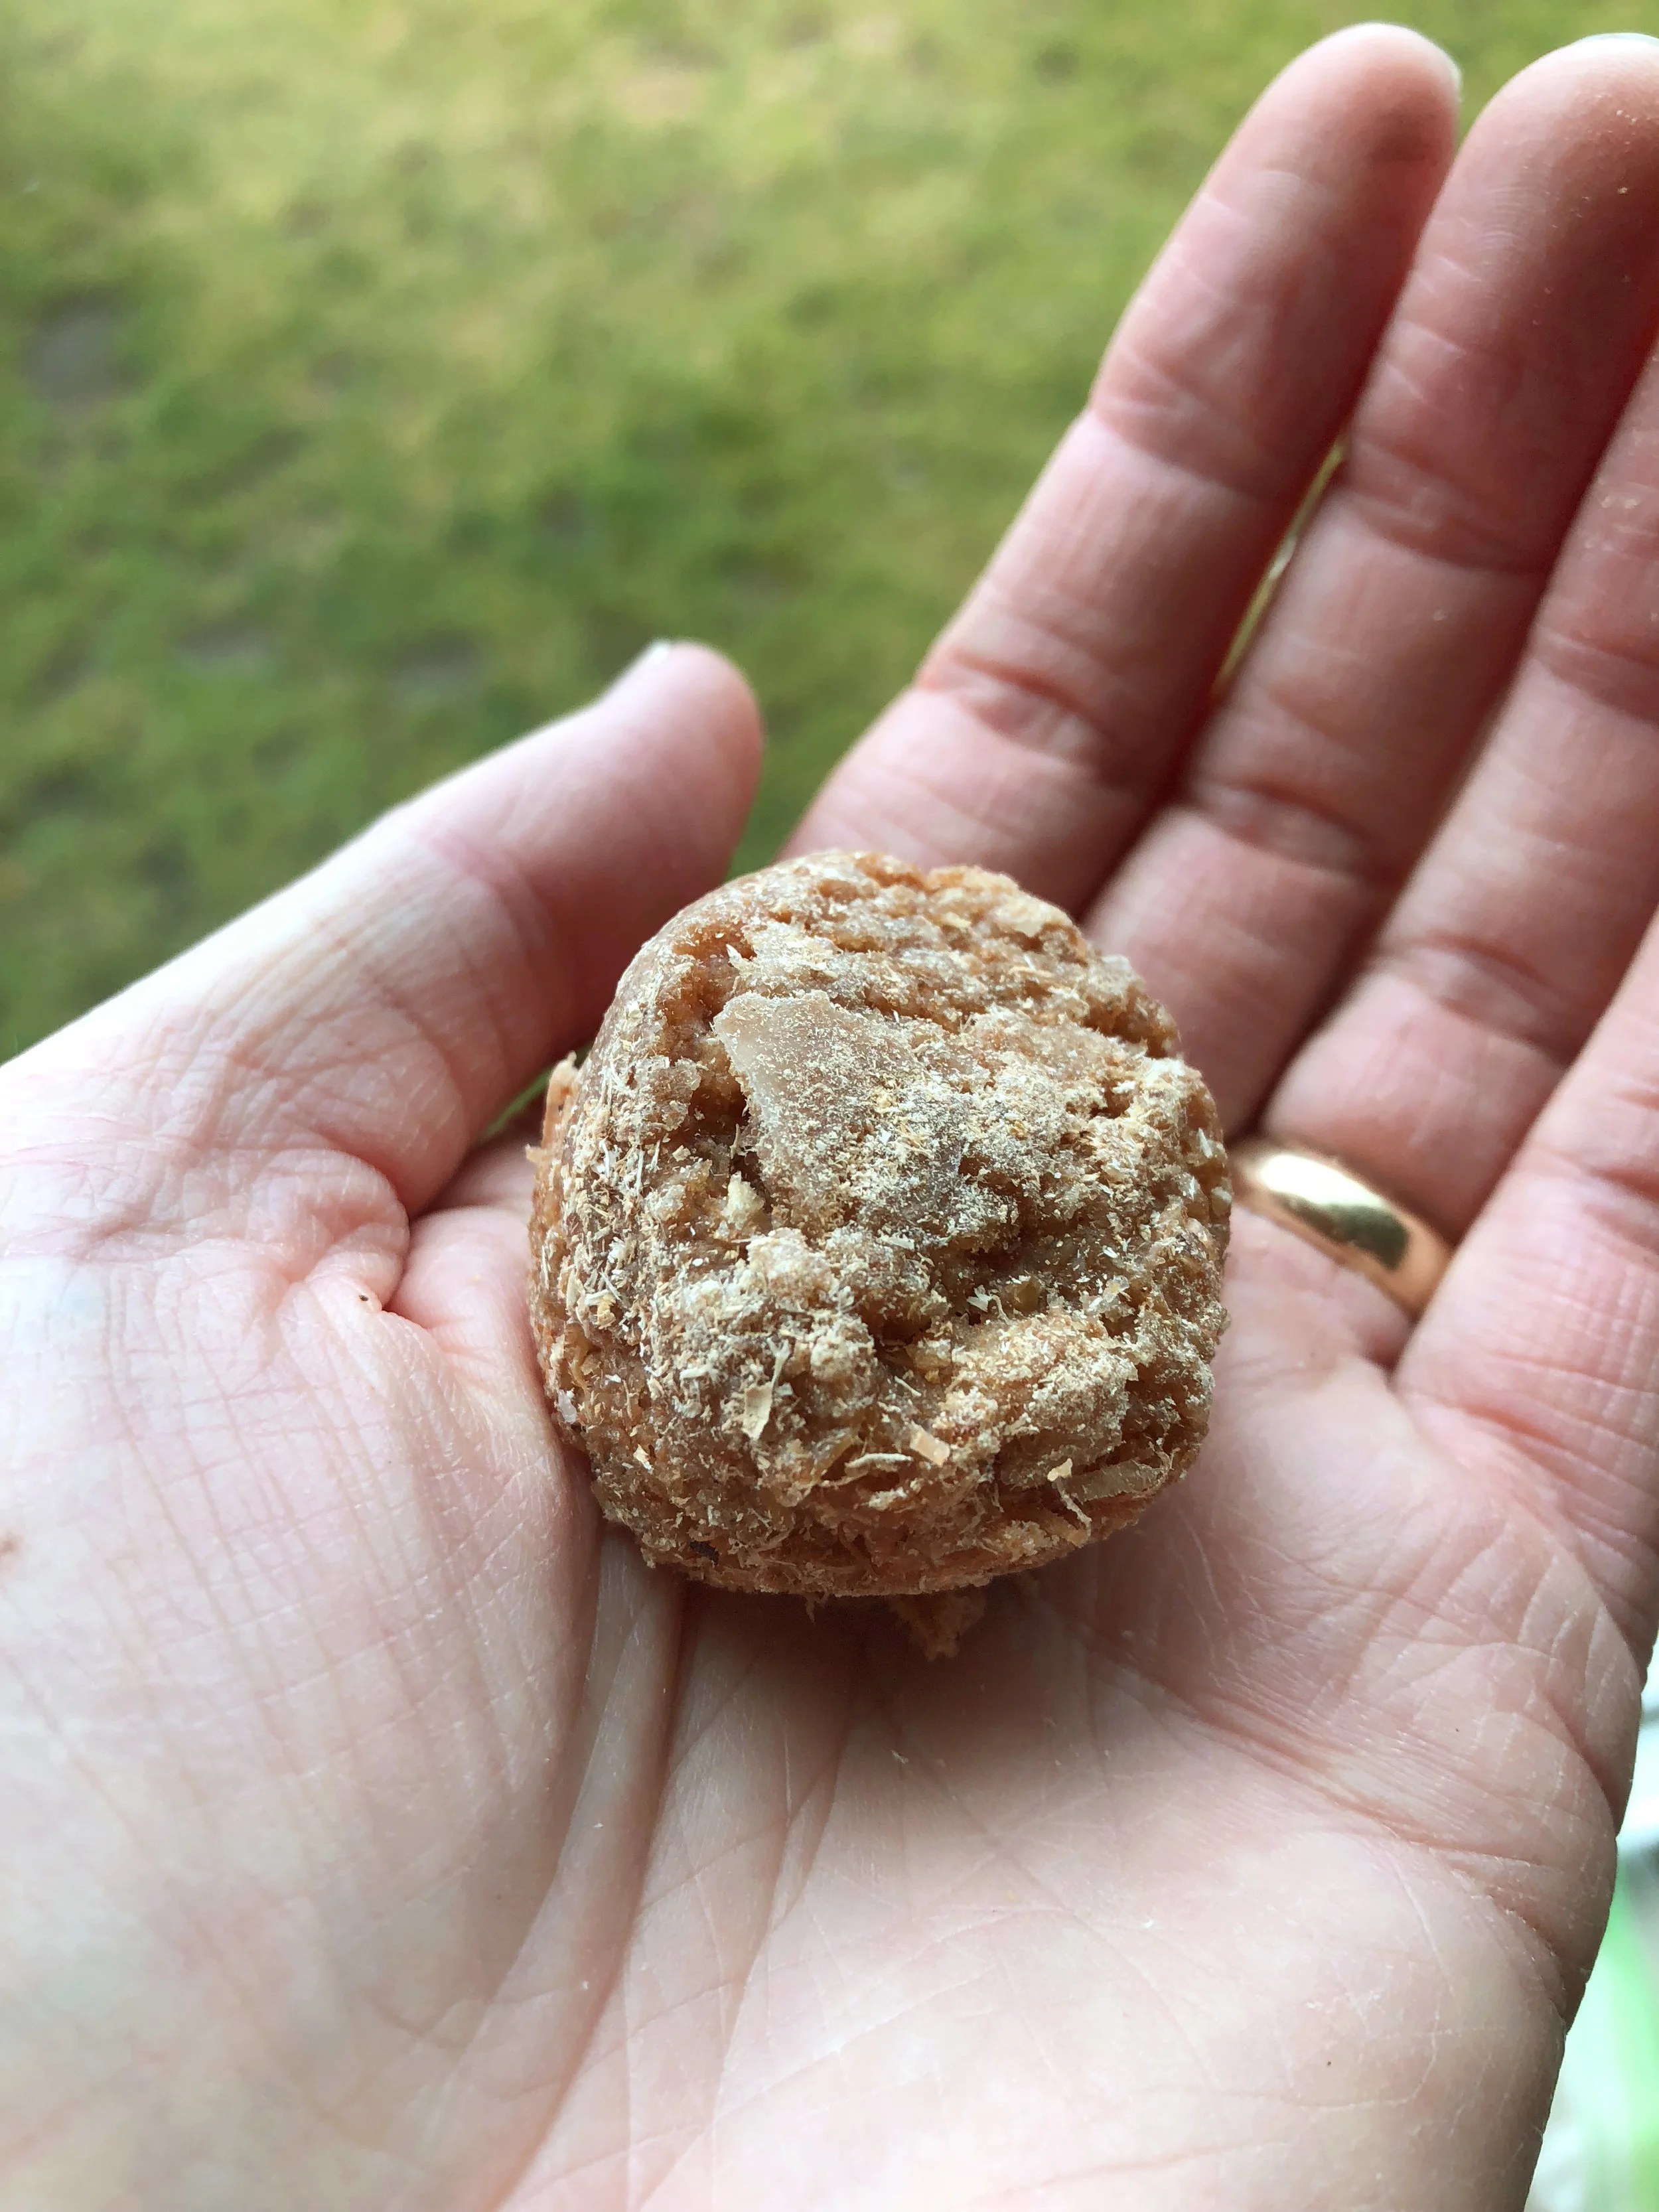
WAX & SAW DUST FIRE STARTERS

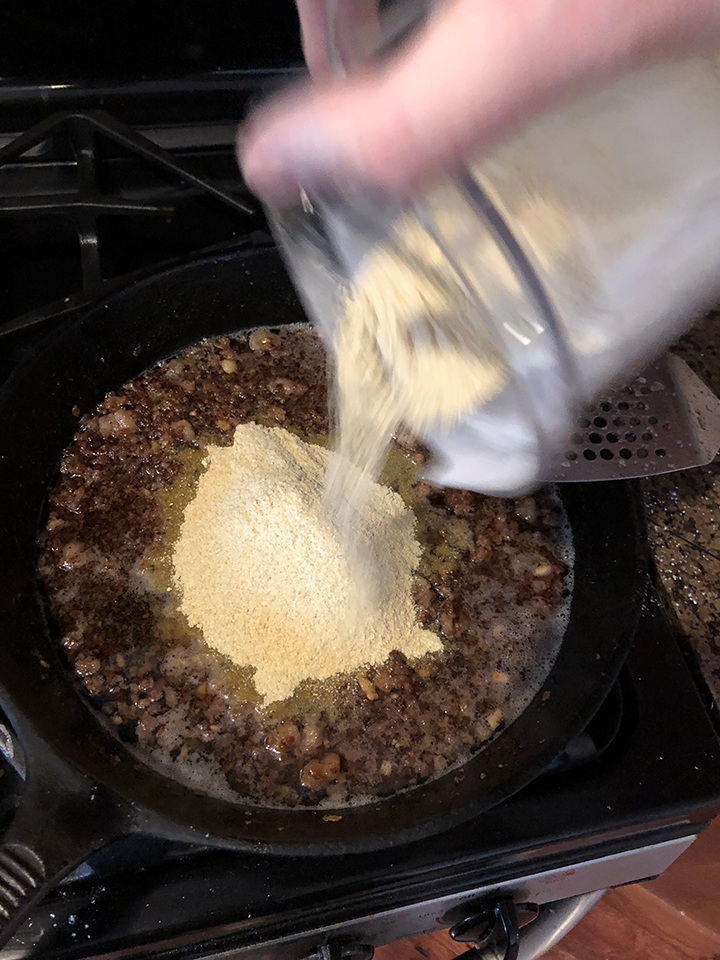
Find a couple empty paper towel tubes or toilet paper tubes. Mark 1" increments along the tube. Cut along those lines to create 1" cardboard discs. These serve as molds for the saw dust. 

colter co fire starter
IMG_1079.JPG

Fill the molds with dry saw dust on parchment or wax paper. Pack it in as well as you can. Next melt the wax in a doubler boiler as described in the wax & cotton directions. Carefully pour the wax over the saw dust. Remember that sometimes when you pour liquids slowly then can drip down the front of the can and off the bottom. Just make sure that you have both potential drip points over the parchment paper before you start pouring. 

colter co fire starter

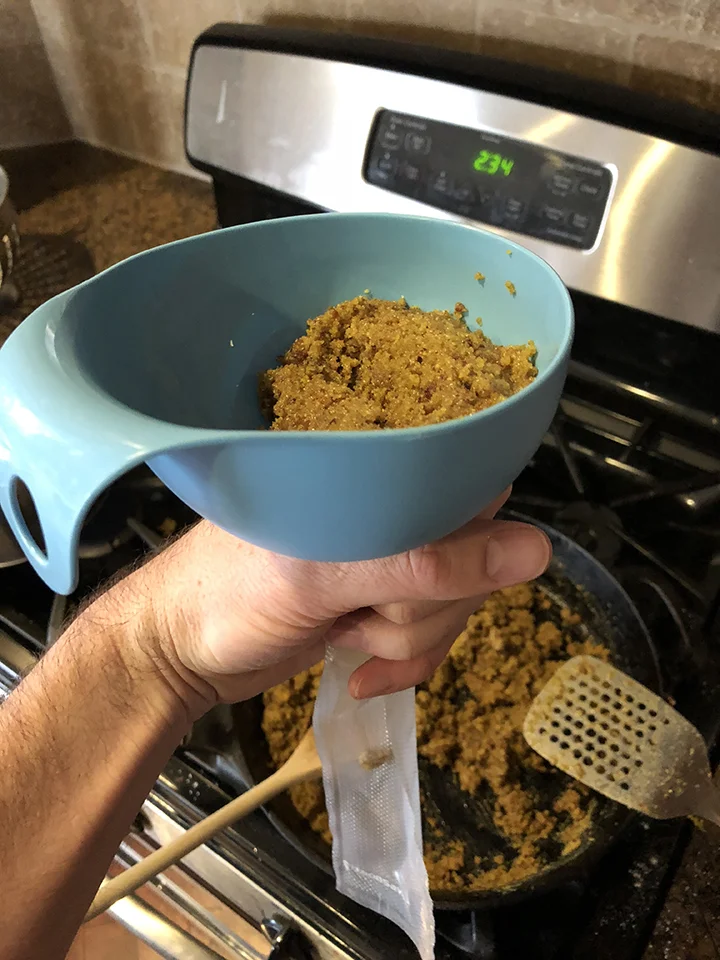
Let them cool down and then peel the cardboard tube off and they're ready to go! I used a little bit of shaved magnesium with the ferro rod to get these going. Again, with a match or a lighter these things would light up like a Christmas tree. 

colter co fire starter

This image does a good job of showing the difference in flame between these two. The wax & cotton burned really well, but the wax & saw dust burned really high and long. If you feel up to taking the extra steps and mess, the saw dust is pretty great! I feel like the combination of the two is pretty solid as well. If you put even a quarter of the cotton fire starter on top for a quick easy light and a big chunk of the saw dust and wax on the bottom you'd be set. 

Let me know if you have a favorite DIY fire starter! 

instructional article

A buchcraft meal in a tube

IMG_0760.jpg

I came across a fantastic book called "Camping and Woodcraft" by Horace Kephart. Published in 1957. It is jam packed with amazing traditional outdoor skills, gear and ideas. I recommend checking it out!

One of the things it mentioned is a food called Erbswurst. Which translates from German to mean pea sausage. I know, it sounds terrible, but hear me out! It's a mix of fats, and split pea flower squeezed into a sausage casing that was used heavily by the German soldiers during WWI. You can cut about an inch off the sausage and boil it to create a rich pea soup. And because of the high fat content it's very shelf stable. It's really an ideal survival and bushcraft food. It doesn't take up much space or require much prep work to make. 

I decided to try this idea out, but I wanted to make a few adjustments. First of all, I decided to use lentil flour instead of pea flour. I prefer lentil soup and it's slightly higher in nutritional value. 

I also adjusted the ingredients slight because I had a hard time finding hard fat. It's the pork fat that holds it's form and gives sausage its structure. I replaced the hard fat with regular pork fat sliced off a pork chop at the meet department of my local grocery store. 

Here's my complete recipe: 

Linsewurst (lentil sausage)

- 1/2 lbs. bacon
- 1/2 lbs. pork fat
- 1 lbs. Lentil flour
- 1/2 onion
- 3 teeth garlic
- Salt and pepper as desired


colter co erbswurst

I began by putting the bacon, fat, onion an garlic in a food processor and turning it into a paste.

colter co erbswurst

I put that paste into the frying pan and cooked it until it the fat rendered out and the onions and garlic cooked through. 

colter co erbswurst

While that was cooking I put the lentils into our Blendtec blender. It turned them into a nice powder pretty quick. There are other ways to do it. A grain mill or another heavy duty brand of blender will do as well. 

When the bacon and onion mixture is nicely browned add the lentil flour. Mix it together well and be ready to work with it while it's still warm. It will start to set up once it cools and that makes everything more difficult. Because I didn't use the hard fat, it made the final product more soft and easier to work with. 

colter co erbswurst

Traditionally this mix would then go into a sausage casing. I didn't have any laying around and did really want to do that anyway, so I make my own casings out of vacuum seal bags. The long term storage of these in a freezer is my end goal and these bags made sense and are super easy to make custom sizes and fill. I used a funnel to force the mixture down into the make shift casing. 

colter co erbswurst
colter co erbswurst

Then I just sealed them up and blamo! you got a lentil sausage!

colter co erbswurst

I did a little backyard field test to see how it turned out. I mixed 1 tablespoon of mix for each cup of water. So each tube would be about 6-8 servings of soup! I boiled it for about 5 minutes to give the lentil flour a chance to turn into a nice broth. It was very satisfying and hearty. 

colter co erbswurst

In the end, I think this makes a fantastic base for wilderness improvisation. I might try a version with different seasoning, and a version with black bean flour instead of lentil. I plan on using it to add fresh foraged plants to on my next outing. I think a hand full of sliced nettle leaves, or a thistle root boiled in this could be pretty amazing! 

This soup is great to use in connection with our Forager bandana. It identifies and explains 7 common edible plants. Several of which would work nicely in this base. I will be using both this year with my kids to help them gain more knowledge and appreciation of wild plants. 


Please let me know if you have any experience with traditional Erbswurst. I'd love to hear it!

instructional article

Trail Ramen

Ramen noodles have long been a staple in my backpacking menu plan. When I was a kid a $0.35 pack of ramen was fine by itself. And they are a perennial hit with my kids. The last thing you want is to hike 3 miles into a lake and have a meal your kids won't eat. But now that I have a palate that is more sophisticated than a 9 year olds they can leave a little bit to be desired. So I've been adding things and trying new options for the past few years. Here are a couple winners that I have come across. They also add nutrition to an otherwise pretty empty meal. Another win for hiking food for kids. 

1. Summer Sausage Surprise

Okay, so it's not really much of a surprise. There's diced summer sausage added to it... I have tried adding different forms of protein to increase the benefits of this meal. I started with chopped up beef jerky. Beef jerky is fine on it's own, but when it's added to an already plenty salty soup it doesn't really do much for me. Plus unless you boil it for quite a while it stays pretty hard. So I decided to add diced and sautéed summer sausage. I liked it much better than beef jerky! I also like to add freeze dried veggies to the mix. It's nice to add texture, flavor and nutrition. 

Note: You may notice that I went with spicy ramen and spicy dehydrated veggies. Yeah, that was a bit much. One or the other would have been fine. 

trail_food_colter_co

I will also point out that a super easy way to cook ramen on the trail is in a freezer ziplock bag. It's like a home made mountain house meal. Just put the ingredients in and pour the boiled water over it. Be sure they are freezer bags and not regular! Those will just melt. For ultra easy clean up just eat out of the bag and zip it up when you're done. Mess contained!

trail_food_colter_co

2. Coconut Curry Chicken Ramen

I made these last year and they were amazing! Super easy and tasty enough to consider making them at home, not just on the trail. They are creamy and have added protein and fat. 

Ingredients:

1 - Package of Ramen noodles (throw away the spice packet that comes with them)
4 - Tablespoons Coconut Milk Powder
1 - Teaspoon Yellow Curry Paste
1 oz - Package freeze dried Chicken 

Put the dry ingredients into a cup of water and bring to a boil. Once that starts to thicken a bit add the noodles and freeze dried chicken. Cook until the noodles are soft and remove from heat. If you're feeling fancy you can garnish with peppers and cilantro like in this picture. I did not...

trail_food_colter_co

I'd love to hear your favorite way to church up Ramen on the trail! Let me know what you do. 


instructional article

Celestial Navigation

Every good skill deserves a back up plan. Navigation is no exception. GPS was a game changer when it comes to wilderness navigation. But it does have weaknesses. Batteries die, devices gets dropped, and sometimes you just don't getting reception. Having a back up solution to GPS is a must. Map and compass is essential skill, but sometimes you don't have a compass with you. That's where celestial navigation can come into play. The great thing about using the sun, moon and starts to navigate is that you don't have to pack them.

I would never suggest going on a trip underprepared. Please do take your 10 essentials with you on any outdoor outing. But if your gear starts to act up, or you're not feeling confident in the information it's giving you, it's good to have this in your back pocket.

When I designed the stargazer bandana, it was to help provide a few basic navigation tips in a format that wouldn't be a burden to carry. I'm guessing you take a bandana on every hike. Why not make it a navigation asset as well. We made it glow in the dark not just because it's cool (which it is...) but as a functional aspect. The soft glow of the ink allows your eyes to stay adjusted to the night sky while you are looking for constellations. The following instructions come directly from our stargazer bandana and will help you make the most of your bandana in the field.

TIP 1: Finding the North Star

The North Star (Polaris) is the only star in the Northern Hemisphere that doesn't appear to move during the course of the night. All the other starts change their location in the sky and so using them to navigate can be tricky. Finding the North Star is a foundational celestial navigation tool. 

colter_co_navigation_star_bandana

The most common way to find the North Star is to trace an imaginary line from the two bottom stars on the Big Dipper constellation. The Big Dipper does move around the sky, but the stars in that constellation are fairly bright and are usually pretty easy to pick out. The North Star is also the last star in the handle of the little dipper.

In the event of it being partially obscured by clouds or trees, or if you are having a hard time finding it, you can also remember that the North Star sits in between the Big Dipper and Cassiopeia (the big W in the sky):

colter_co_navigation_star_bandana

TIP 2: Finding East West

East and West can be determined in a few ways, including marking shadows over time. Place a stick in the ground and mark where the top of the stick leaves its shadow on the ground with a stone. Wait a half and hour or so and mark the new position of the stick. If you draw a line connecting those stones it will point East/West, the second rock being farther east. You can also determine North and South with a perpendicular line. For obvious reasons this method can be hard to do when it's cloudy. 

colter_co_navigation_star_bandana

Depending on where you are on the planet just watching the path of the sun can be a bit misleading in terms of finding East and West. Living pretty far north in Washington State, the sun rises and sets pretty far south in the winter. And it never really gets near the center of the sky. 

At night a good way to determine East and West is to watch the Orion constellation. The top star in Orion's belt always rises and sets within 1 degree of East and West. Where ever you are on the globe and all seasons. Pretty cool, huh?

colter_co_navigation_star_bandana

TIP 3: Finding South

In addition to the stick shadow method of finding South, you can use the moon. The points on a crescent moon line up to point South. This one is more approximate, but it's a great thing to use on nights when the North Star and other constellations are covered with clouds, but you can still make out the shape of the moon.

colter_co_navigation_star_bandana

All of these methods should be practices when you get a chance. Any time I get a clear view of the sky I always try to find the cardinal points. Like all things, they get easier with practice. If you'd like a convenient way to remember this tips or to pass these skills on to the next generation our Stargazer bandana is the way to go. Get yours here.